Welcome, Guest
Username: Password: Remember me
  • Page:
  • 1

TOPIC: In the Repair Shop

In the Repair Shop 1 year 7 months ago #1820

  • rogersimmonds
  • rogersimmonds's Avatar Topic Author
  • Offline
  • Administrator
  • Administrator
  • Posts: 562
  • Karma: 8
  • Thank you received: 140
Yes, I know the title of this thread is the same as a popular BBC program, but it seems pertinant.

Model flying is not for the faint hearted, and inevitably, there will be crashes. Fortunately, our little model jets are pretty robust, and 90% of the time they can be repaired. This is a lot quicker than making another one! :S

This thread will, I hope, contain many hints and tips how to bring a broken model back to, if not its original pristine condition, at least to a flyable condition.
First, the reconstruction must be accurate, not add a lot of extra weight and not alter the CG.
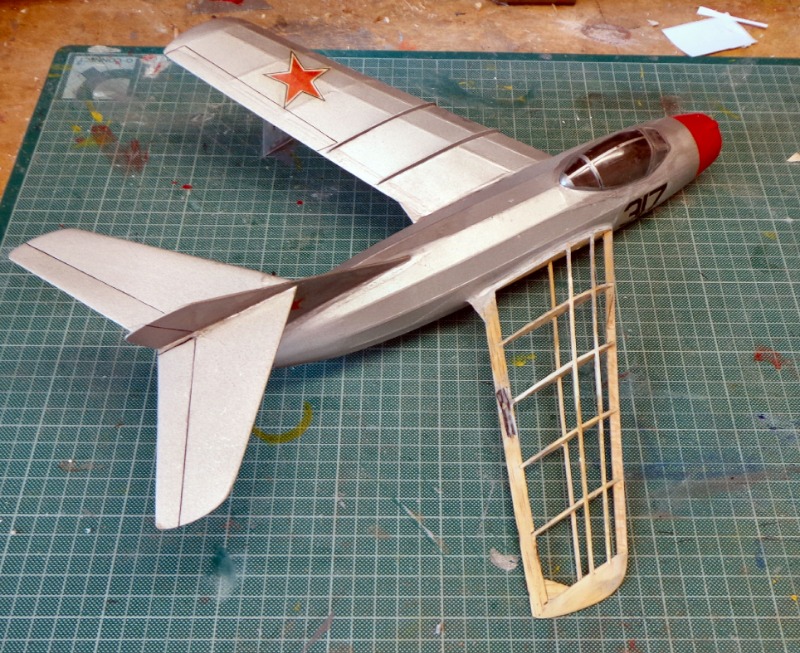
To illustrate some methodologies, here is the inital reconstruction of my MiG 15's starboard wing, which was badly fractured in a skewed hard arrival at the recent PFA (see the 'Flying' thread) :woohoo:


First, all old tissue was stripped off using dope thinners, which also removed the old paint and the ribs, etc, rubbed down with 400 grade ''wet or dry'.
Note the new spliced-in leading edge, the staggered splices of the1/16” wing spars and the discrete carbon fibre reinforcement of the (which is un-spliced, I'm afraid, tut, tut!) trailing edge. The trough, which had been quite scorched when the model was on the ground, is relined with two layers of 80 gsm paper. I’ll add the protective foil after repainting.

More later ......
Attachments:
The following user(s) said Thank You: ahmetcalfe

Please Log in or Create an account to join the conversation.

Last Edit: by rogersimmonds.

In the Repair Shop 1 year 7 months ago #1821

  • rogersimmonds
  • rogersimmonds's Avatar Topic Author
  • Offline
  • Administrator
  • Administrator
  • Posts: 562
  • Karma: 8
  • Thank you received: 140
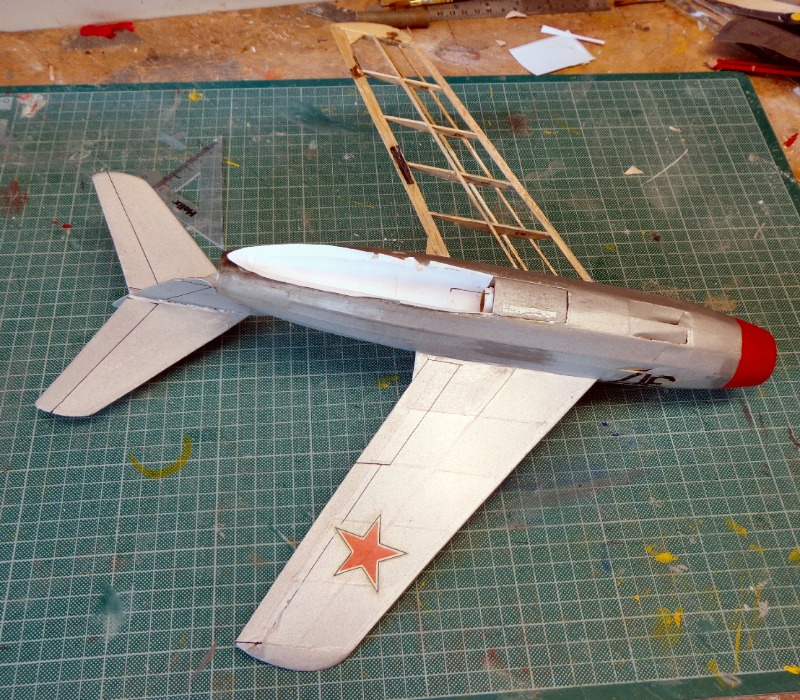
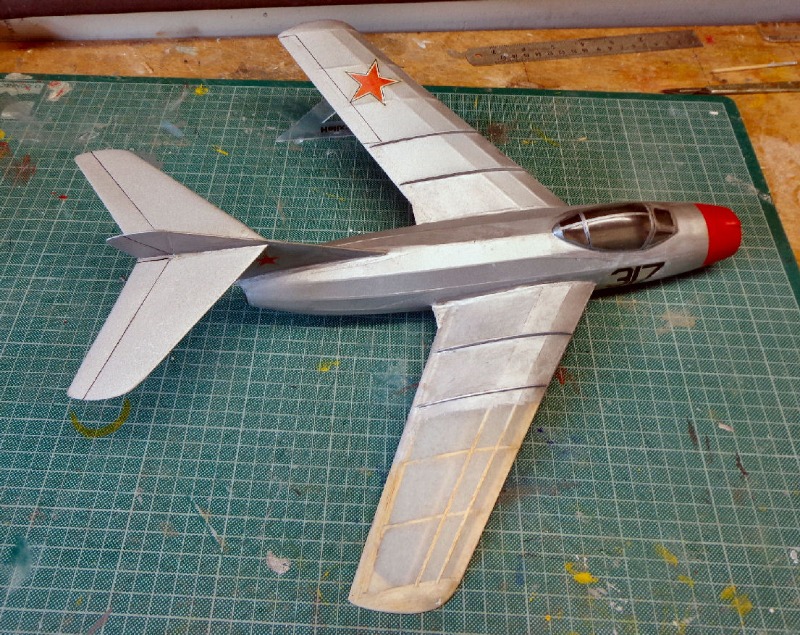
Progress, what with one thing and another, has been slow, but the wing was covered (wet, using my favoured ancient Modelspan) and given three coats of dilute HMG shrinking dope. Attaching the tissue to the wing root with dilute PVA was aided by gluing in a thin strip of 80 gsm paper. Fractured fuselge panels were cut out and patched.

So far so good; aat this point the 'fun' began as I tried to match the original silver finish :S


Note the motor mount has been modified for a TSP L-2.

I was unable to remember what I had used fifteen years ago and I doubt the cellulose based spray can is still availble. Hmmmm ... I had some antique Revell siver/metal 90 enamel which was quite close and not too bad in small areas of the fuselage, but trying a brushed finish on the wings was disappointing (see second picture above). :dry:

I have ordered a spray can of this, now acrylic, hue and will see how it goes when it finally arrives.

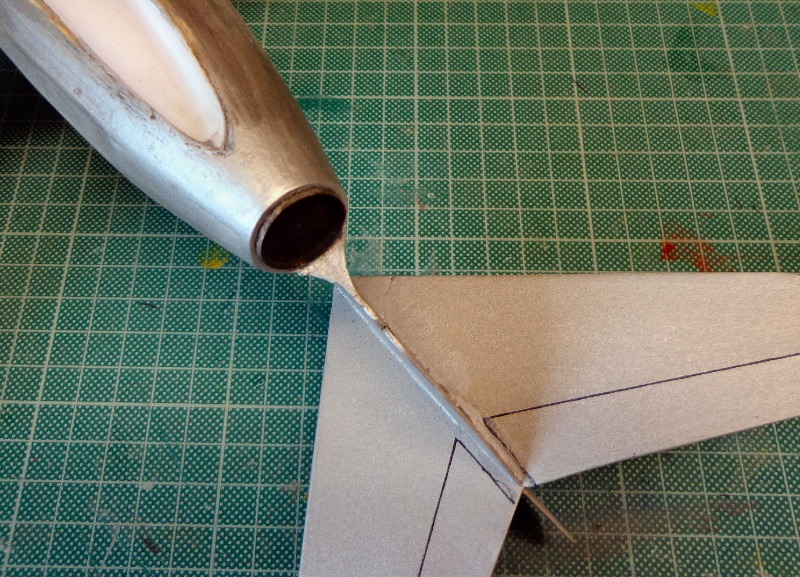
In the meantime, I have gone over the model with a magnifier and made good all dodgy joints and less than perfect 'field repairs' and decided to upgrade the 'jet pipe to match my current (more particular than in 2007) sensibilities.


It now looks a biit more like the real one and - here's the thing - it is lighter than the original (awful, in retrospect!) painted 1mm plywood disc. Fortunately, this was easily drilled out to fit the 0.5 mm ply disc of the new jet exhaust. I'm pleased with the result, which is painted in silver overlaid with Tamiya 'Smoke'.:)

This has been, so far, an interesting exercise. As I have emphasised, the model is 15 years old, and in the course of repairs etc I kept thinking, "why did I do that?" and "wouldn't do it like that now!" :woohoo:

Hve my standards improved or my OCD got worse?
Attachments:
The following user(s) said Thank You: ahmetcalfe, Tendera

Please Log in or Create an account to join the conversation.

Last Edit: by rogersimmonds.

In the Repair Shop 1 year 7 months ago #1825

  • rogersimmonds
  • rogersimmonds's Avatar Topic Author
  • Offline
  • Administrator
  • Administrator
  • Posts: 562
  • Karma: 8
  • Thank you received: 140
The Mig 15 is now finished, ready for Old Warden Scale Weekend, weather permitting.

This is what it looked like, in 2015, before I foolishly overpowered it:


Nice, but a bit bland :dry:

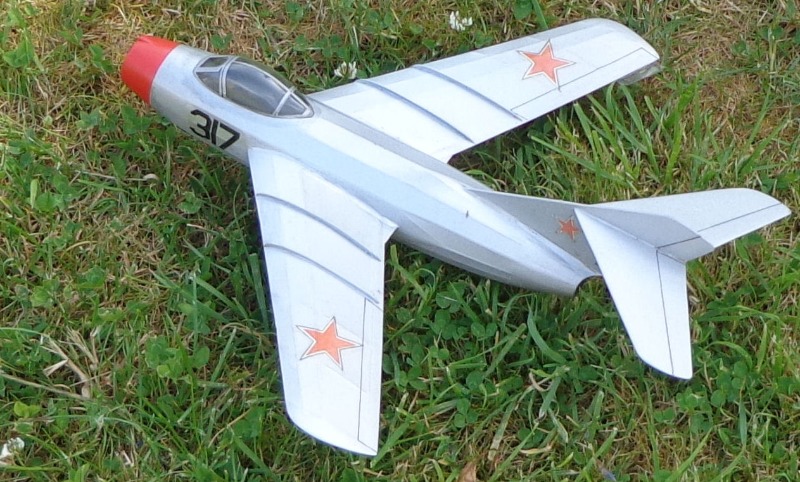
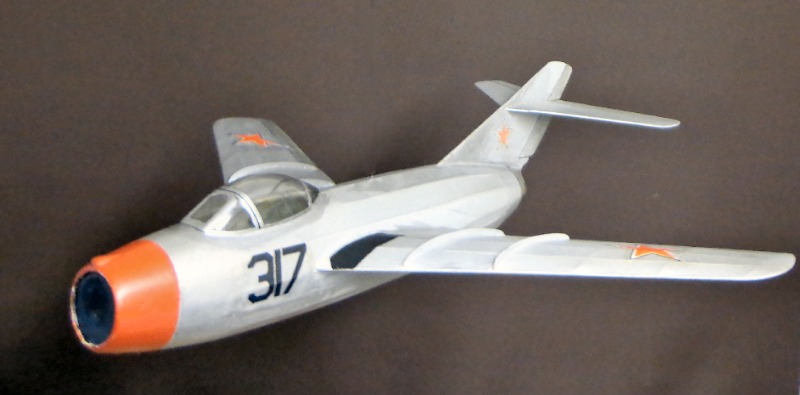
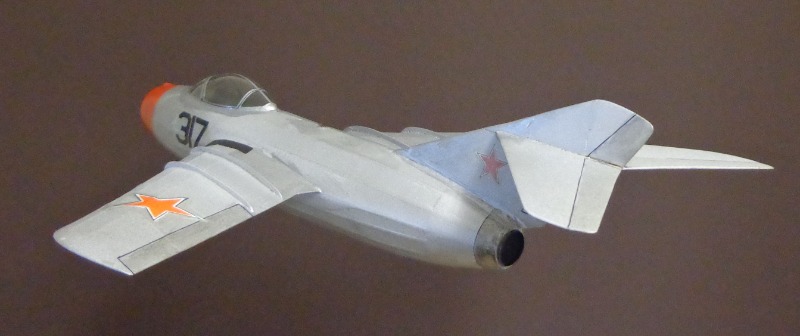
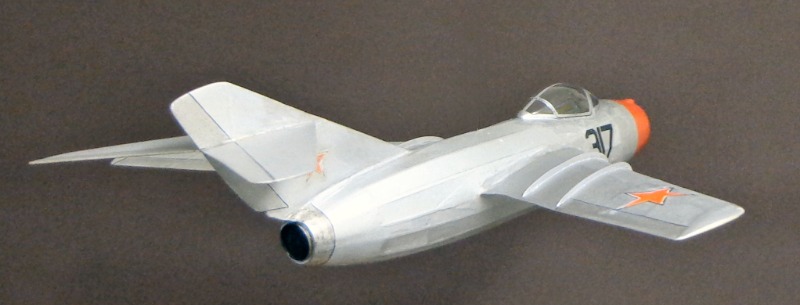
and below, this is what it looks like, older, wiser and restored:


A spray can of Revell acryllic Metalic (silver) 90 proved a good match and it covers very well indeed. I decided to add some contrast to my previous 'plain vanilla' silver finish. This is the first time I've used Tamya 'smoke' and think it looks quite effective on the control surfaces and around the jet pipe.

I was pleased thatall this added little or no extra weight and the model balances in the same place.

Should go well with a 150 mN TSP L-2. Note to self: do not try it with a 320 mN L-2, or if you do, drill the motor out to 2mm, which gives a very acceptable 170 +- 10 mN thrust for 19 sec. :)
Attachments:

Please Log in or Create an account to join the conversation.

Last Edit: by rogersimmonds.

In the Repair Shop 1 year 7 months ago #1826

  • LukeGoymour
  • LukeGoymour's Avatar
  • Offline
  • Junior Member
  • Junior Member
  • Posts: 30
  • Thank you received: 19
Very nice work Roger, I think the 'older and wiser' version looks pretty smart. looking forward to building my Mig 15 this winter!

Please Log in or Create an account to join the conversation.

"You make the clouds your chariot, you walk on the wings of the wind" Ps 103 (HB 104):3

In the Repair Shop 1 year 6 months ago #1833

  • Terry Kidd
  • Terry Kidd's Avatar
  • Offline
  • Administrator
  • Administrator
  • Posts: 191
  • Karma: 3
  • Thank you received: 85
This Mig really is a beauty, especially with those wing fences.

Based, if I'm not mistaken on the KK design by Bill Dean? (I had a version in the Jet-X days days and it was a good flier.)

Roger adds:

hi Terry, welcome back to the forum! This is indeed Bill Dean's design and the one KK produced as a kit. Many of the MiG's design features (like the 'straight through' wing ) were copied (to good effect) by Richard Crossley et al in the 'Rapier Revival' twenty years ago. For example, the Bell X-1 series.
It's convenient for building accurately, but makes any subsequent (and inevitable) repair quite tricky.:S
I've been promised Richard's Bell X-1A. This has a broken wing, so the mending of the MiG 15 was a sorta rehersal for this restoration job.

Please Log in or Create an account to join the conversation.

Last Edit: by rogersimmonds.
  • Page:
  • 1
Time to create page: 0.086 seconds
Powered by Kunena Forum