 Random image Random image |
 |

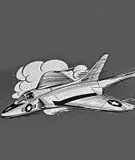
DOUGLAS F4D SKYRAY
nitrocharged
|
 |
|
 |
 |
ROCK-IT A GO-GO
| ROCK-IT A GO-GO |
| Description: |
Reprinted from Flying Models, July 1966, pp. 24, 44, Reprinted from Flying Models, July 1966, pp. 24, 44, 94
Easy-to-build Contest Rocket F / F Aircraft … Takes the Jetex "150" unit, spans 29", worthwhile to build.
Here is a model that combines our favorite sport of model flying with the jet age. While we don't have the thrust of a Saturn rocket here, we do have enough power in the Jetex 150 engine to achieve a good consistent flying model.
There are, I believe, three directions you can go with a rocket model. The handlaunched glider type, which gets plenty of altitude but suffers in the glide due to the high wing loading. The large model with a low wing loading which suffers from lack of altitude due to excessive drag. So we come to number three, a medium sized light model to get the best of the first two. We feel we have reached this goal with "Rock- It A Go Go."
WING
The wing construction is a little different but it's quick to build light and warp resistant. The first thing to do is make a rib template from plywood or aluminum. The ribs are cut from light firm quarter grained 1/16" sheet. The tip ribs are made by cutting a fu111ength rib from the trailing edge to the required length. The spars are sliced from medium straight grained 1/16" sheet to get matched sets. The trailing edge is cut from quarter grained 1/8" sheet and shaped at this time, use light wood. The leading edge is medium 1/8" square.
STABILIZER
Start by tapering a piece of 1/32" x 3/16" spruce as shown on the plan. Glue the spruce to the 1/32" sheet with white glue and weight it down while drying. Add ribs and reinforcements. Sand and apply two coats of plasticized dope. I used micro- film solution. Cement on the combination dethermalizer hold down hook and the stabilizer is finished.
FUSELAGE
Cut the fuselage sides from 1/32" sheet. Next, shape the spruce backbone. Drill the spruce motor mount as shown on the plans and then solder the #2-56 nuts to a piece of brass shim stock. Notch the back-bone to clear the nuts. Cement the back-bone and motor mount together, sandwiching the brass strip between them. Cement this assembly to one of the fuselage sides. Notch the 1/16" x 3/16" fuselage bottom at the rear for the rudder. Now attach the bottom to the fuselage side and install formers. Add the other side of the fuselage and weight down until it is dry. Add 1/32" plywood to front with 3/16" sheet filler. Drill the hole for the safety wire. Cut the rudder from light quarter-grained 1/16" sheet, and cement 1/16" square balsa to the top of the rudder.
Slide the rudder into the rear of the fuselage, making sure that it is square to the fuselage. Next add the stabilizer platform. Now mount an empty Jetex engine on the fuselage, followed by the stabilizer. Rubber band the wing to the fuselage and position it over the C. G. location shown on the plans. Now cement the wing platform to the fuselage. Drill the holes for the wing hold downs and dethermalizer hard- ware. The aluminum foil is applied with contact cement. Add the hardware and don't forget the safety wire.
I used a fishing leader because it already has a clip on the end of it. Finish it off with a couple of coats of clear dope.
FLYING
Check all surfaces for warps, and remove them if there are any. Assemble the finished model and mount an empty engine. Check C. G. location once again. Hand glide the model, shimming the stabilizer to get the correct glide. Do not change the wing setting, as the glide turn is achieved by tilting the stabilizer. The turn can be to the right or left, be- cause we have no torque to trouble us under power.
The first power flights should be made with only one charge. Light both fuses, (the DT and the engine) point thy model up at about 40 degrees and wait for the thrust to build up. Launch with a gentle push. The power circle should be in the same direction as the glide. If the turn under power is too tight, use opposite rudder tab. Now you can go on to two and three charges. Don't forget to use that safety wire. This can prevent a motor flying loose in a crash, under power.
A word or two here about the care and feeding of Jetex engines. To produce maximum power the fuel must be dry. Before a contest I place the fuel I'm going to use in the trunk of my car on a good hot day. Leave it there all day. Then wrap it in aluminum foil and put it in a jar with a tight lid. DO NOT PUT THE FUEL IN AN OVEN. Have at least two engines While one is cooling you can be flying with the other one. At a contest, change the gasket at the rear of the engine every flight. Clean the engine after each flying session. The residue left after the fuel burns is corrosive and will plug the hole and pit the edges of the barrel. This will prevent a good seal and cause a power loss. A steel wool soap pad does the trick. Good Luck. |
| Keywords: |
rock-it rockit jetex 140 |
| Date: |
04.01.2021 13:52 |
| Hits: |
2657 |
| Downloads: |
4 |
| Rating: |
0.00 (0 Vote(s)) |
| File size: |
49.4 KB |
| Added by: |
nitrocharged |
|
|
 |
