 Random image Random image |
 |

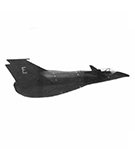
F-19 STEALTH FIGHTER
Comments: 0
nitrocharged
|
 |
|
 |
 |
TOPSY BUBBLE CAR
| TOPSY BUBBLE CAR |
| Description: |
WHEN they first made their appearance in this country the three-wheel bubble cars caused quite a lot of comment and some people were inclined to smile at the look of these unusual motor cars. Before very long, however, motorists and other road users stopped smiling, forgot their prejudices, jumped into their bubble cars and started to go places. And go is the right word, for these comfortable, economical little cars certainly can get a move on. Our model, described here, is probably the simplest one to build in this book, so you are only a very few hours' work away from owning a bubble car of your own.
Join two 3" wide pieces of 1/4" thick balsa sheet together and trace on to it the body shape. Cut out carefully, noting that you have indicated the position on the body of the Jetex plywood mounting piece. Cut out the rear wheel fairings and cement in place. Now add the front axle of 1/4" x 1/4" balsawood, noting the streamline section (Stage 2), and add the cabin struts. Now cut out the plywood Jetex mount and drill it with two holes to take the metal clip for your Jetex motor. Cement it firmly in place on the body. Bend a piece of 18 S.W.G. wire to the shape of the rear axle. Press the turned-up end into the under surface of the body and lock in position with a small piece of tape well cemented over the wire. Cut out and add the front axle and fairings, sandpapering them to the section.
Trace the drawing of the driver off the plan, and transfer it to 1/8" sheet. Cut out carefully and either colour in with powder or poster paints or coloured ball-point pens. Cement the driver in position. Now make a pattern of the window shapes on paper and lay it on a piece of thin transparent Cellophane. (This can be had from your model shop in sheets 12" x 12" and costs about 10d. each.) Cut out the shape in the Cellophane and cement in place, using as little cement as you can. Repeat for the opposite side. Carefully round-off all the edges of your bubble car with fine sandpaper. Add the celluloid wheels, holding the rear wheel on the axle with a piece of plastic tubing.
Add the rear-wheel covers and sandpaper fairing to shape, Give your model two coats of clear dope. Add the details: headlamps, flashing indicator lights and rear lamps. Make the number-plates from thin cardboard and slip into cuts on the body at front and rear. Then bend two loops from 18 S.W.G. wire. Make small holes in the left-hand headlamp (model viewed from rear) and the top of the left-hand side of the rear-wheel fairing. Press the loops of wire into these holes. These loops are for the thread line along which Topsy runs. Screw the Jetex Atom 35 or 50C clip in position and slip the jet motor into the clip. Topsy is now ready for painting in any colour scheme you favour. Plastic enamel quick- drying paint is recommended. Here is a suggestion. If someone among your family or friends owns a bubble car you could paint your model the same colour and use the same registration numbers-which would be rather fun, wouldn't it? As a precaution against scorching your model, when you are igniting the Jetex igniter wick to fire the Jetex motor, we suggest that you cut a small piece of asbestos paper about 1" x 14" and cement it immediately behind the motor clip (asbestos paper is included in the Jetex motor kits). Topsy can be run free, as well as along a guide line-but choose a smooth surface, won't you? |
| Keywords: |
topsy racing bubble car jetex 50 |
| Date: |
02.02.2021 00:08 |
| Hits: |
5127 |
| Downloads: |
7 |
| Rating: |
0.00 (0 Vote(s)) |
| File size: |
31.8 KB |
| Added by: |
nitrocharged |
|
|
 |
