 Random image Random image |
 |

CUTLASS XF7U-1
nitrocharged
|
 |
|
 |
 |
CHEECHACK
| CHEECHACK |
| Description: |
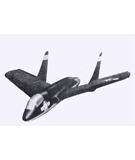
FOR VERSATILITY and cheapness to build, Cheechack would be hard to beat, but why such an unusual name? The answer is that the original models were built while the designer was serving with the RAF in Singapore, and he styled the nose of these pretty little sportsters after the local 'household' lizards of the same name!
The first prototype was for a Jetex PAA Loader unit, and took just three evenings to make. It was designed primarily as a 'different' semi-scale machine, and despite the relatively rugged construction weighed only 2-3/4 oz complete. The softly-sprung undercarriage used proved very effective, 'soaking up' landing surfaces most realistically. It also prevents damage, and will provide upright landings on even rough ground.
Initial flight tests were very successful - no trimming problems were encountered, the glide being very flat and the model would hold tight turns if required. This is most useful if flying from small fields as it prevents it from going too far away.
Following this success, two more versions were built one powered by a Cox Tee Dee .010 mounted on a pylon, and another rubber-powered. These both possessed similar flying characteristics, again being easy to trim and fly. The rubber job was very stable, while the power model was quite lively - needing care with the amount of fuel given to prevent 'flyaways'. The rugged yet light structure has enabled all ver-sions to survive untrimmed prangs without any damage, and these models have been thoroughly flight-proven over the past five years, always providing a popular attraction due to their novel appearance. Interchangeability of the components allow a variety of models to be flown, according to one's particular whims!
The fuselages for the Jetex and Tee Dee-powered versions are identical, while the rubber-powered model is slightly modified. Select the longerons from evenly matched 3/32 in sq medium hard balsa to prevent warping the fuselage. Protect the plan by covering with thin polythene sheet, and then cut the longerons to size, pinning them to the plan with pins either side of the wood - not through, as this would weaken it. Now add the 3/32 sq uprights and sheet gussets. On the R3 (rubber-powered) model, add the sheet reinforcement for the motor peg. When the glue has quite dried, remove and build a duplicate. Cement the 3/32 sq reinforcement pieces at the wing position. Bend the nose leg to shape, then sandwich it between two pieces of 1 mm ply, using an epoxy or PVA adhesive.
Cut out all the crosspieces (noting the different taper on R.3). Then pin the three crosspieces at the wing position in place on the plan view. Invert the fuselage sides and glue them to these crosspieces, using a set square to ensure that they are truly vertical. When dry, add the corresponding pieces to the bottom of the fuselage, thus forming a rec-tangular box. Again, leave to set, then bring the nose together around the undercarriage former and join the fuselage ends for the J1 and P2 versions. Insert the crosspieces at the tail for the rubber-powered model. Check that the fuselage is not warped, then add remaining crosspieces top and bottom. Finally, sheet in the rear bay of the R3 fuselage.
Cut out the formers F1 and F2, glue in position, and add the stringers. Fill in the bottom of the fuse-lage where shown with 3/32 in sheet, and glue the nose block in position. Carve and sand this to shape, then hollow out to accept noseweight. Leave open on the underside temporarily. Bend the 20 swg under-carriage to shape, then cut out the 3/32 sheet u/c mounting floor to shape. Sandwich the u/c between two pieces of 1 mm ply, using an epoxy adhesive, then glue the ply to the floor piece. The whole unit may then be glued in place. Using the pattern provided, cut the acetate sheet for the cockpit and windows to size, and glue in place.
For the rubber version, make up the noseblock as shown, and cross laminate two 2-bladed propellers to form a four-bladed pusher. Make the tailplane from 3/32 medium soft balsa. Cut the centre section out, bevel the edges, and glue the 'V' portions on, to provide 3-14 in dihedral under each tip. Cement this joint thoroughly. Hinge the elevators, if used, with thin aluminium strips so that they may be altered for trimming, but will not move accidentally.
Cut out all the wing ribs from medium-soft quarter grain wood, noting that the R3 version uses ribs W2 throughout. Pin the preshaped leading and trailing edges for one wing panel over the plan, together with the lower spar. Glue all the ribs in position. |
| Keywords: |
cheechack jetex 150 D. Dodds |
| Date: |
02.02.2021 06:36 |
| Hits: |
5030 |
| Downloads: |
5 |
| Rating: |
0.00 (0 Vote(s)) |
| File size: |
32.5 KB |
| Added by: |
nitrocharged |
|
|
 |
