
Things have been quiet on the Jetex blog front lately and recently Roger gently nudged me and suggested an update might be in order. I will say I’ve not had that much time for model flying and development of late due to some outside interference. In fact one of my ideas for the Jeticopter somehow or other led me into making some other distinctly unJetex things. And these, while making nice presents, don’t represent progress on the Jeticopter front.

Neverthless, this is one of several earlier Jeticopter versions. It has a 3D printed fuselage from what is called lightweight PLA. The hinges, blade holders and motor holders are made from red PLA and have brass hinge pins.
One of my goals with the Jeticopter, or the Terrycopter as one of the MakerLab boys christened it, is to make as many parts as possible laser cut or 3D printed. I especially wanted to eliminate the bending of piano wire, cutting of brass tube, binding with stout thread and securing with balsa cement that looms so large in the original Jeticopter instructions. To achieve this I spotted an idea called a living hinge.
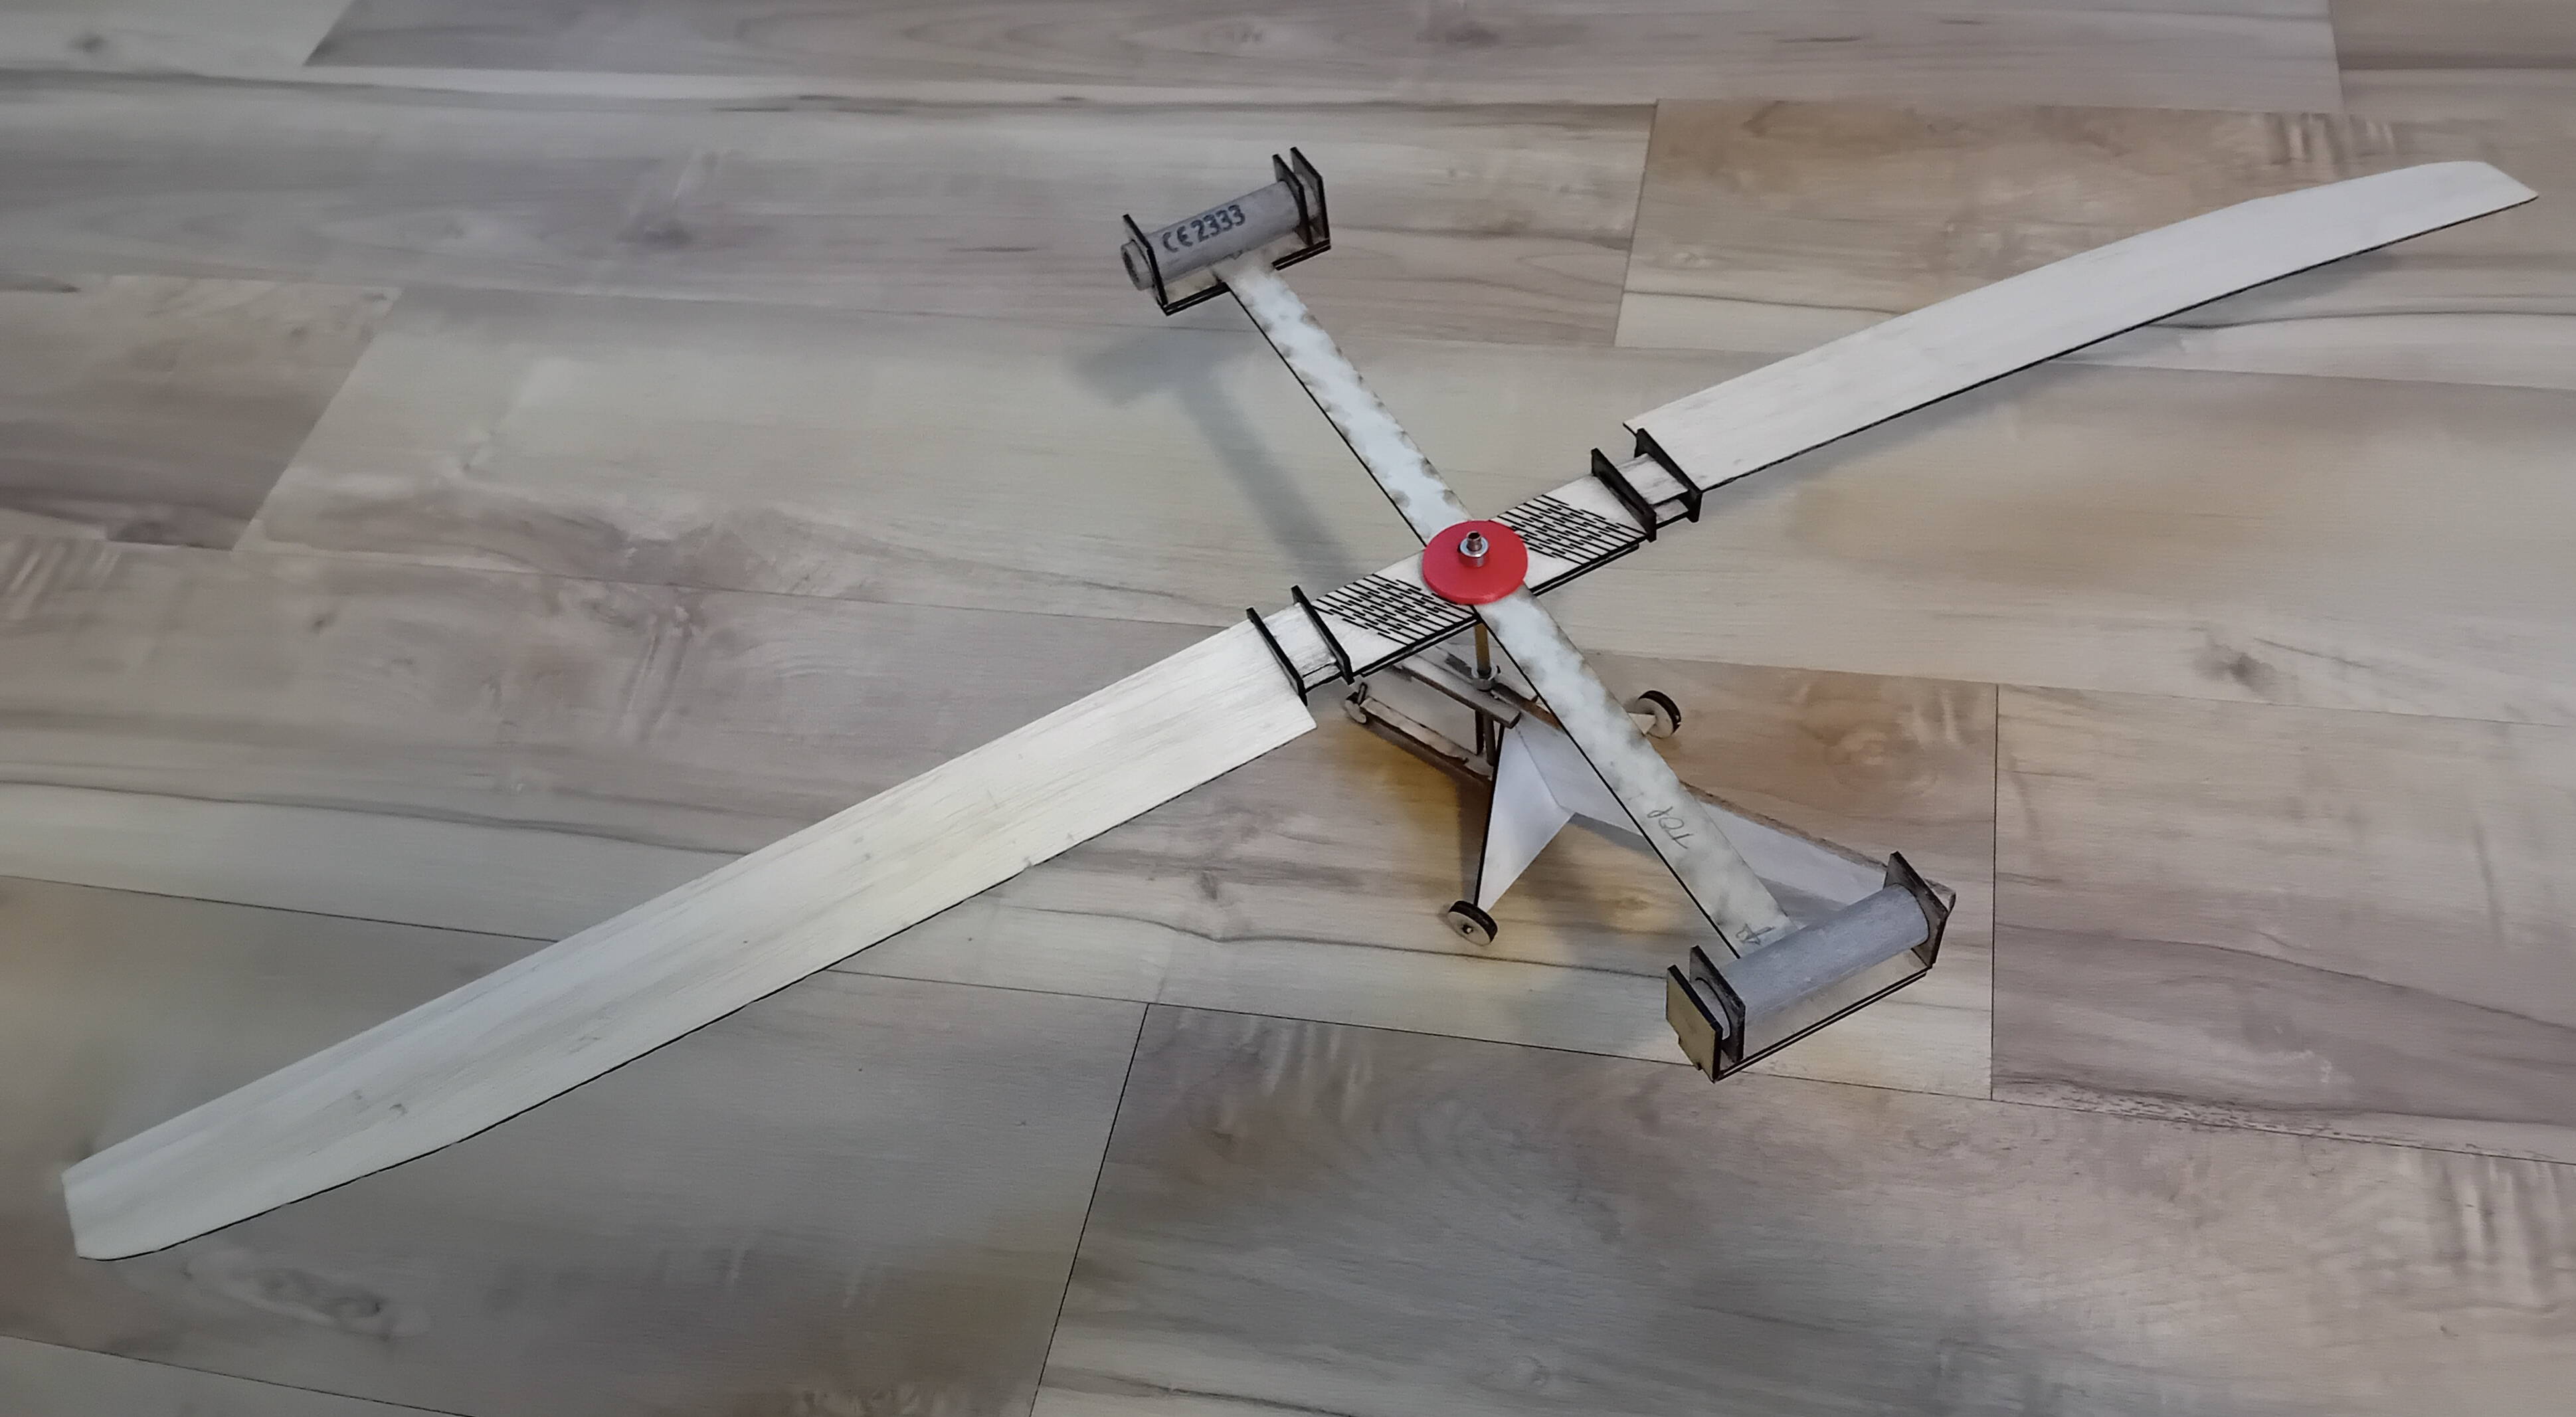
So this is a revised version which is much lighter and gets closer to the design parameters that I found in the Frank Zaic manual that I wrote about in the last blog. Here the motor holders, fuselage and the hinges are all laser cut. I’m using a combination of balsa and 1 or 2mm plywood for these parts.
Now the living hinge, which you'll see here, is a way to implement a hinge without a hinge pin. You’ve probably have encountered one of these before as they are often used in plastic boxes with integral tops. Now the idea has been extended to laser cut materials such as ply or plastic.
This entails taking a reasonably sturdy material, plywood or plastic, and cutting it in such a way that it can be bent on the desired axis. While I was playing around with the design for the Jeticopter hinge my friend Gerlinde spotted my drawings and decided that such a concept would make a nice plant holder if modified just a little.
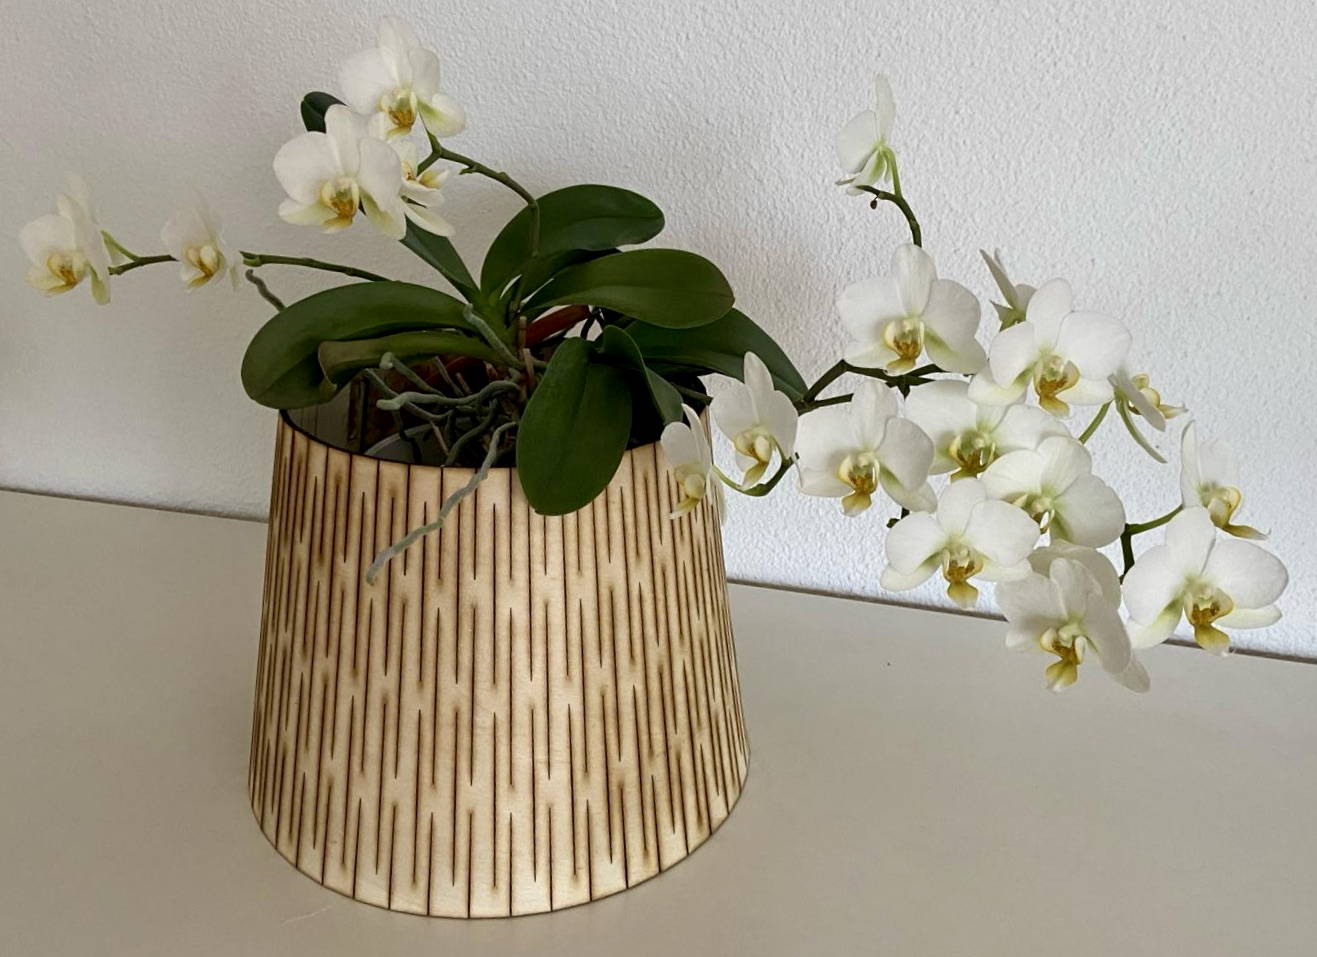
And here's one of them. These are made from 2mm thick ply.
But back to model aircraft — in the latest version most of the parts are laser cut. There’s just a couple of 3D printed plastic parts, the ones in red, a length of brass tube and 4 steel collets. The fuselage has laser cut parts from 3mm balsa or 1mm ply. The whole thing weighs in at 89gms with two unused motors. So, much closer to specifications seen in Frank Zaic’s annual.
So, all this good stuff that means there must be some snags !
Indeed so and I’m still working through these. The main issue is coming up with a cut pattern that provides sufficient ‘hinge-ability’ without compromising the shear strength of the material. As we know the whole Jeticopter concept hinges (tee hee) around the necessity for centrifugal forces to keep the rotor plane flat under power. Then, as the power phase ends the rotor disc cones up which, because of the ‘delta hinge’, gives a negative rotor angle of attack which allows an auto rotation descent. Effectively the rotor has been turned into a centrifugal governor controling the rotor blade angle of attack.
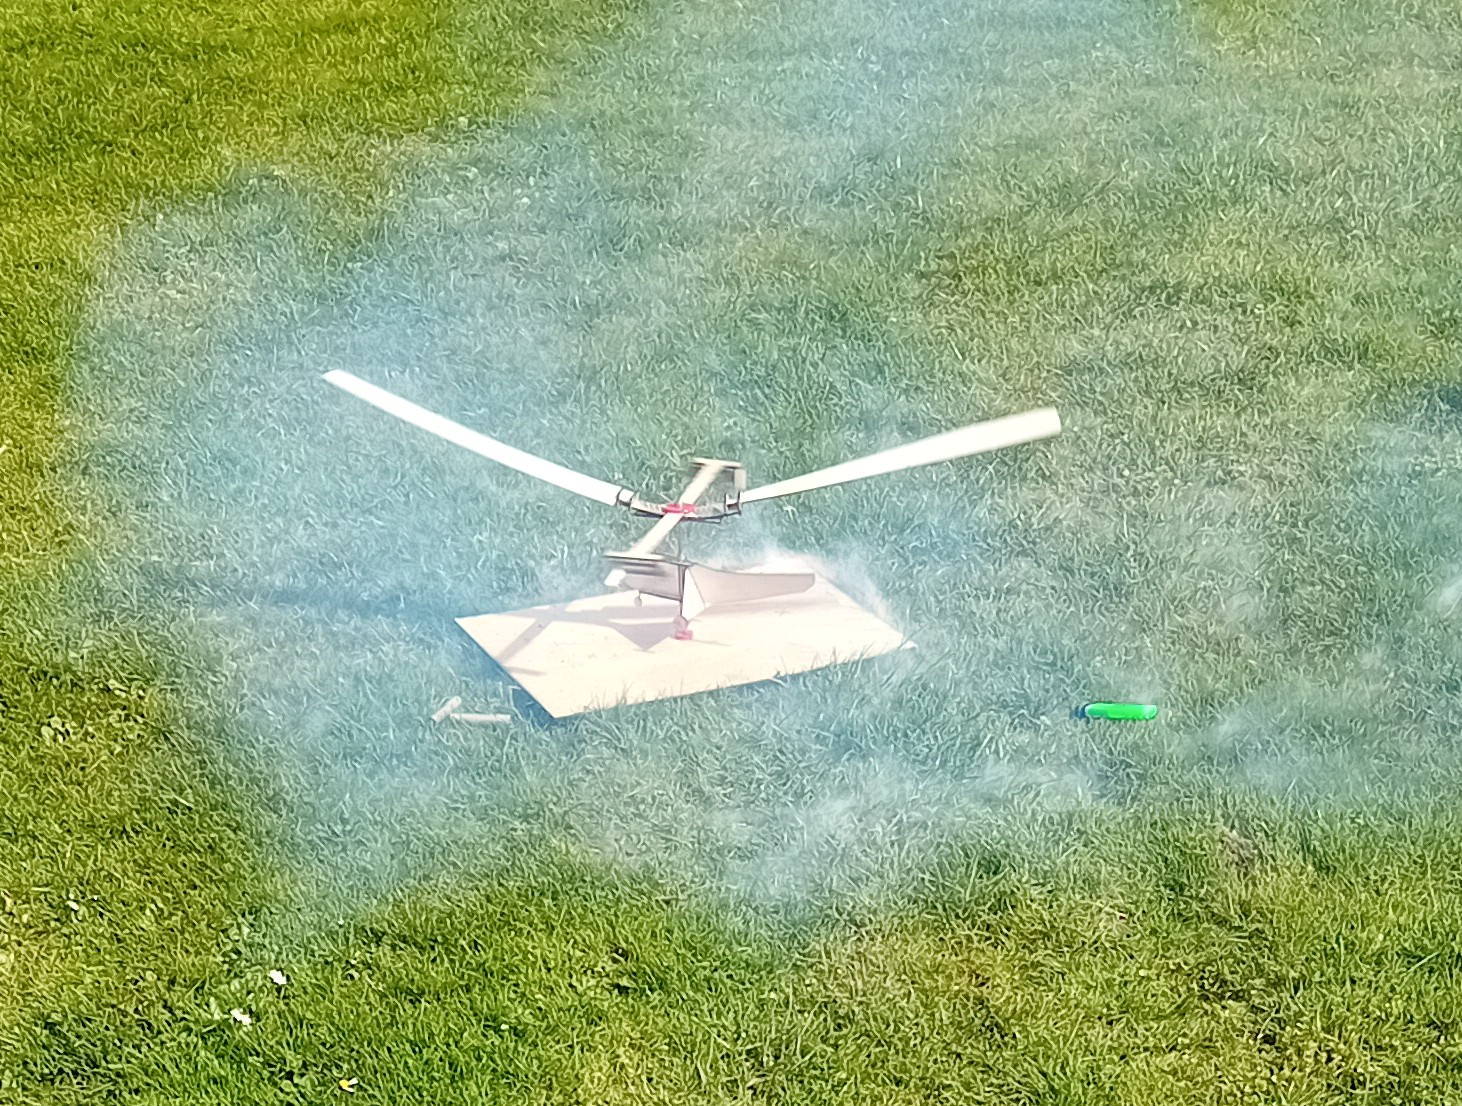
In this image we see a Tendera L2 powered attempt and as is clearly seen the rotor disc is anything but flat. The next attempts, which sadly I don’t have pictures of, followed an upgrade to L3 power. With these the rotor speed and the centrifugal force was sufficient to shear the living hinges as the rotor got up to speed! Next weeks work will include laser cutting some 4mm plastic to make a more robust hinge.
In addition I've had problems of getting both motors started simultaneously. Now, it must be said that starting Tendera motors with the green certificated fuse is way, way easier than preparing a traditional Jetex motor with gauze, spiral fuse etc. However, when one must start two motors simultaneously one starts to think, ‘perhaps there’s a better way’. I’ve been using the green fuses supplied with the Tendera certified motors and lighting first one fuse at its end and the second fuse about midway along its length - with the hope of getting a more or less simultaneous lite off of the two motors. If one has a lighter that stays lit this works fine but with cheap disposable lighters and cold days getting two lit simultaneously has not always been possible. In any event it would be nice to be able to set the model up on its launch stand, retreat to a safe distance, set the cameras rolling and flick a couple of switches to get a simultaneous double ignition every time. Ideally after a suitably stirring and dramatic, Jeff ‘Thunderbirds’ Tracey, style Five, Four, Three etc.
To this end I’ve been developing a two channel electrical ignition.

This contains two hefty NIHM cells, a circuit board so that these can be recharged from a phone charger and the switches you see here. Two loops of nicrome (resistive) wire are pushed into the nozzles and away, I hope, we go. The box is also laser cut from ply.
I’ve already concocted a simple launch stand with a vertical rod. The Jeticopter mast is abrass tube which threads over the rod. This will, I hope be rather better than hand launching with the fuselage held in the left hand while the right hand flicks frantically at the trigger of a disposable lighter trying to get the second fuse going. We'll see.
More soon...