Welcome, Guest
Username: Password: Remember me

TOPIC: Sabre for L2HP

Sabre for L2HP 4 years 2 months ago #853

  • ahmetcalfe
  • ahmetcalfe's Avatar Topic Author
  • Offline
  • Administrator
  • Administrator
  • Posts: 292
  • Thank you received: 119
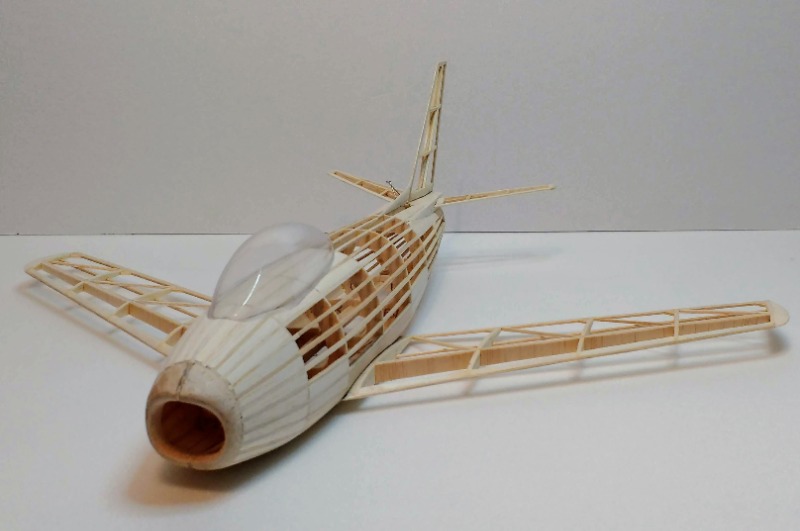
Thanks, I have deliberately built it on the tough side but with light wood (if that is not a contradiction) the current weight of the balsa is 17.2g and am hoping to keep to 18g finished. I expect it rise to double that when covered with Airspan and airbrushed ( I haven't decided yet on a final scheme) so probably the flying weight will be around 40g, one can hope. My Aristo-Craft Swift is 43g and that flies pretty well but it will all depend on how draggy this one turns out to be.

Please Log in or Create an account to join the conversation.

Sabre for L2HP 4 years 1 month ago #871

  • ahmetcalfe
  • ahmetcalfe's Avatar Topic Author
  • Offline
  • Administrator
  • Administrator
  • Posts: 292
  • Thank you received: 119
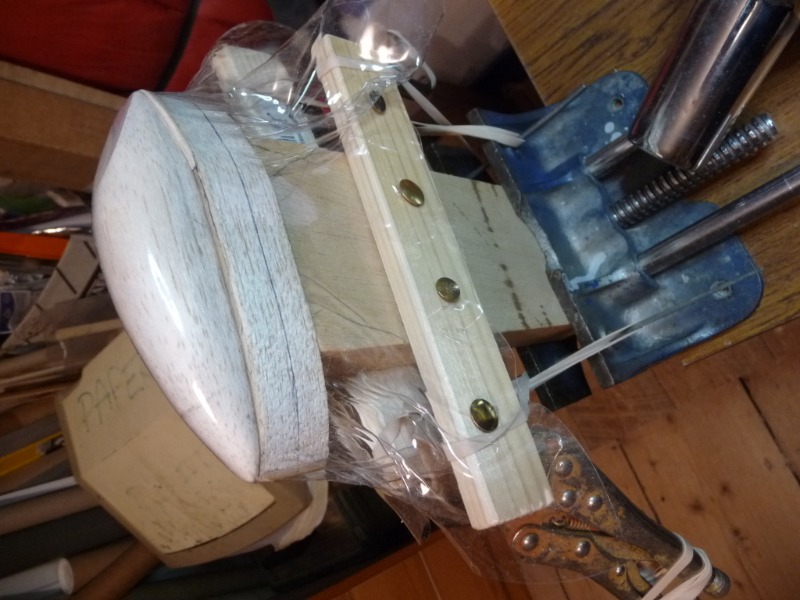
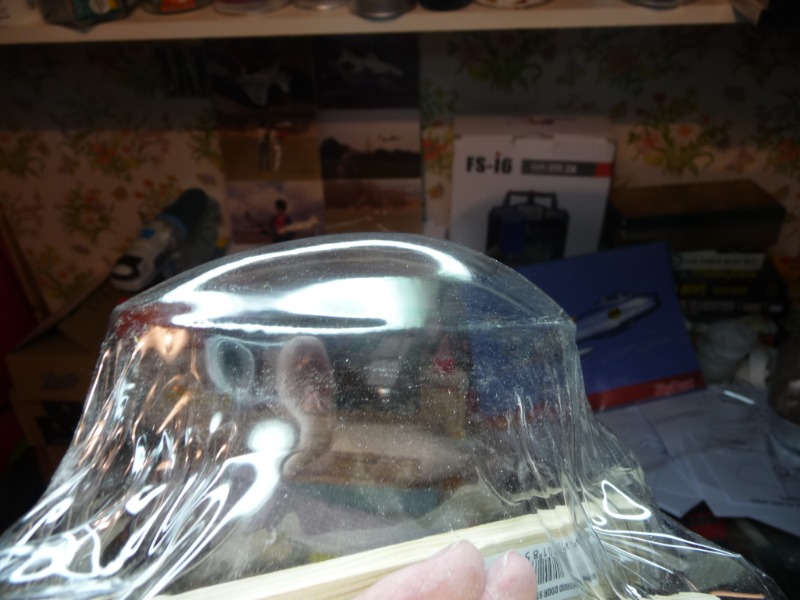
The material I have used here on this first trial run at moulding a canopy was scrounged from wife’s craft goodies, it looks like PVC and moulds very well and early results looks like it will glue OK. At .25mm It was too thin to use with the plunge method so this is my improvised Heath Robinson version of a ‘pull down’ method. This requires an operator with multiple arms like an octopus so I have to improvise with rubber bands and weighty clamps to hold the edges down. This is not quite the final version as I want a better fillet all round the bottom of the canopy which I form with a plate with a hole that is tight fit on the lower periphery of the canopy. The edge of the hole is carefully radiused to give me the fillet and is done as a final operation once the canopy has been formed, locally heating one side at a time with my covering hot air gun. It seems to work, but next time I will have to keep the dust off!
Attachments:
The following user(s) said Thank You: rogersimmonds

Please Log in or Create an account to join the conversation.

Sabre for L2HP 4 years 1 month ago #872

  • ahmetcalfe
  • ahmetcalfe's Avatar Topic Author
  • Offline
  • Administrator
  • Administrator
  • Posts: 292
  • Thank you received: 119

The Sabre is nearly ready to cover now with a couple more bits of infilling to do and plenty of sanding. I have been looking at colour schemes for some while but am still undecided. I have always wanted to model the Sabre that I saw flashing around over the Thames near RAF Benson in the mid 1950’s on a dull wet day, no doubt showing off what a Sabre could do when the RAF first had them. Despite the dull camo maybe now is the time to do it, we’ll have to see!
Attachments:

Please Log in or Create an account to join the conversation.

Sabre for L2HP 3 years 11 months ago #889

  • ahmetcalfe
  • ahmetcalfe's Avatar Topic Author
  • Offline
  • Administrator
  • Administrator
  • Posts: 292
  • Thank you received: 119
After much procrastination over colour schemes covering has started at last. This is heat shrink Airspan not tissue and hoping to do it in one piece per side, not my favourite part of modelling as despite careful sanding and inspection the covering always reveals a few bloops, oh well get on with it. The plan is to do it in Brit camo from the mid 1950's.
Attachments:
The following user(s) said Thank You: rogersimmonds

Please Log in or Create an account to join the conversation.

Sabre for L2HP 3 years 11 months ago #900

  • ahmetcalfe
  • ahmetcalfe's Avatar Topic Author
  • Offline
  • Administrator
  • Administrator
  • Posts: 292
  • Thank you received: 119
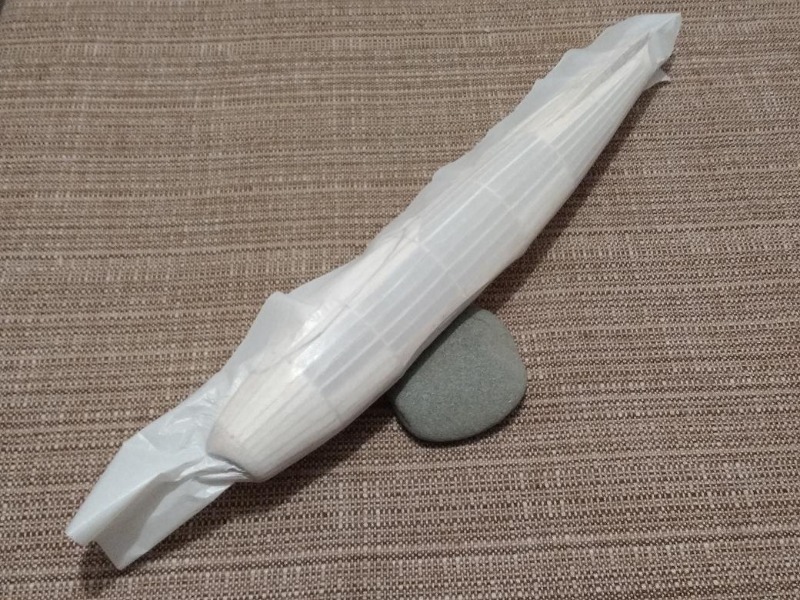
The fuselage covering is now complete, again the second side was done with one piece of Airspan. Slow progress but getting there.
Attachments:

Please Log in or Create an account to join the conversation.

Sabre for L2HP 3 years 11 months ago #932

  • ahmetcalfe
  • ahmetcalfe's Avatar Topic Author
  • Offline
  • Administrator
  • Administrator
  • Posts: 292
  • Thank you received: 119
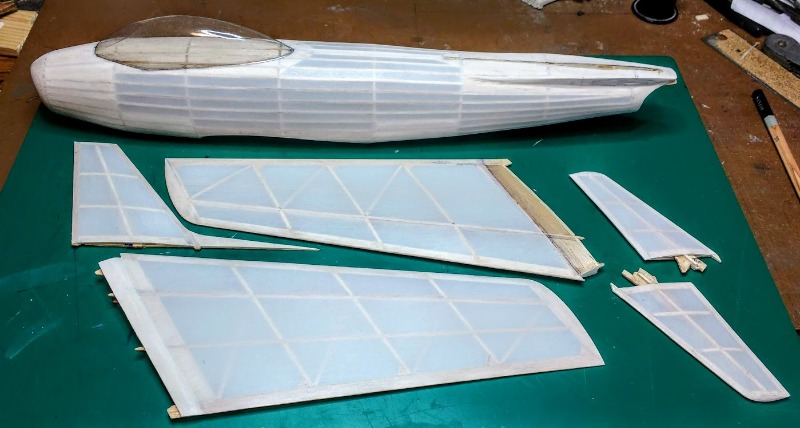
The covering is all done now, the lower of the two wings shows the underside, the right hand end of the wing above shows the socket type attachment area. I can't easily put it all together without gluing it for some quick test glides so that will have wait until after painting, if it doesn't fly well after that I will have to put it down to experience and enjoy it as a hangar queen. I have enjoyed the build so far in any case.
I haven't made two left hand tailplane halves, one is upside down (the lower one) and the section is symmetrical.

Attachments:
The following user(s) said Thank You: rogersimmonds

Please Log in or Create an account to join the conversation.

Last Edit: by ahmetcalfe.
Time to create page: 0.089 seconds
Powered by Kunena Forum