Welcome, Guest
Username: Password: Remember me

TOPIC: Building the Skyleada Cutlass for Jetex 50

Built-up Skyleada for Jetex 50 5 years 5 months ago #767

  • ahmetcalfe
  • ahmetcalfe's Avatar
  • Offline
  • Administrator
  • Administrator
  • Posts: 293
  • Thank you received: 120
Well worth the effort, it is all looking great.

Please Log in or Create an account to join the conversation.

Built-up Skyleada for Jetex 50 5 years 5 months ago #768

  • rogersimmonds
  • rogersimmonds's Avatar Topic Author
  • Offline
  • Administrator
  • Administrator
  • Posts: 562
  • Karma: 8
  • Thank you received: 140
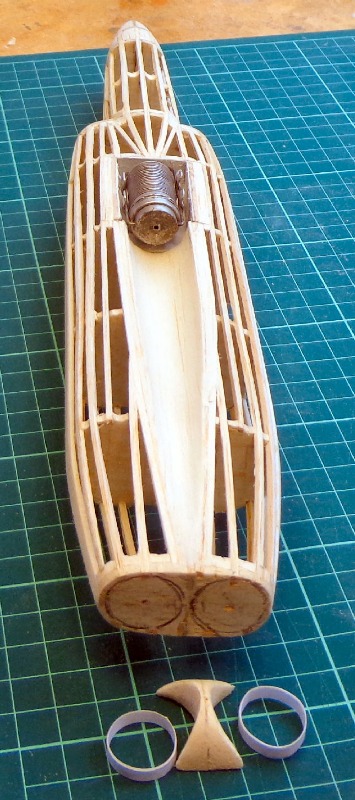
I was able to get back to the workshop only recently. First job was to make a motor mount. The suggested method on the plan is to screw the metal clip directly to the 1/16"x 1/4" balsa K13. This seems totally inadequate to me, so I made a box from 1/16" balsa, the bottom being a 1/64" ply /balsa/1/64" ply sandwich. This gives the screws something to bite on. The whole is lined with asbestos paper. I've seen too many Jetex models immolate themselves :woohoo: so it is important to protect he highly flammable balsa/tissue structure from the heat .

All this may be 'over-engineered' (typical of me) and the whole weighs 4 grams. But the motor clip is secure and firmly attached to the model!


I also line the trough with light 1/32" balsa. This gives something for the foil to be attached too and the foil can be replaced when necessary (especially important for a Rapier powered model, less so for Jetex with its cleaner exhaust). Note the paper jet pipes and rear fuselage 'jet pipe divider' (I'm sure there is a technical term for this, but I don't know it :oops: (I really should get out more) :


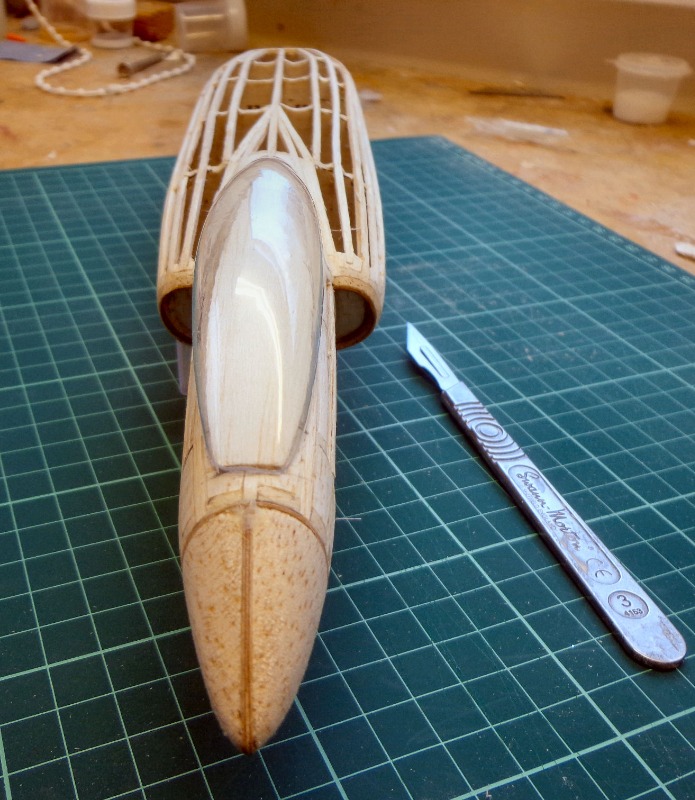
I also flattened the top fuselage where the canopy goes and added 1/32" balsa sheet to match the canopy. This gives something for the canopy to 'key' to and ensures it's in the right place and the right shape! Note the sculpted formers.


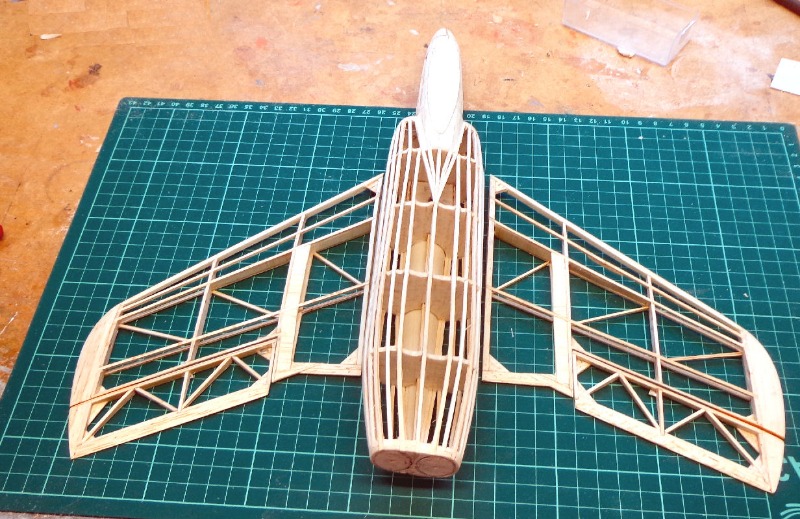
At this stage I couldn't resist getting an idea what the finished structure will look like:


Not too bad: if only I could add lightness :S
Attachments:

Please Log in or Create an account to join the conversation.

Last Edit: by rogersimmonds.

Built-up Skyleada for Jetex 50 5 years 5 months ago #769

  • ahmetcalfe
  • ahmetcalfe's Avatar
  • Offline
  • Administrator
  • Administrator
  • Posts: 293
  • Thank you received: 120
Looking good

Please Log in or Create an account to join the conversation.

Built-up Skyleada for Jetex 50 5 years 4 months ago #770

  • rogersimmonds
  • rogersimmonds's Avatar Topic Author
  • Offline
  • Administrator
  • Administrator
  • Posts: 562
  • Karma: 8
  • Thank you received: 140
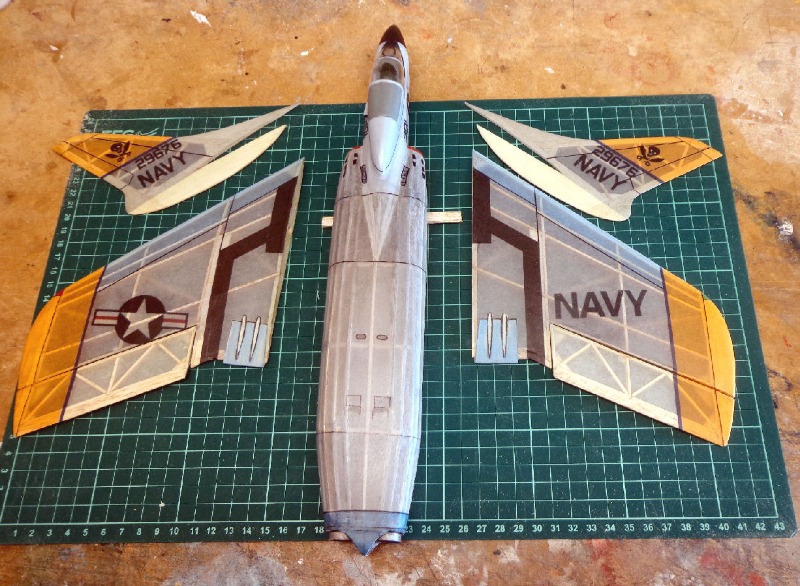
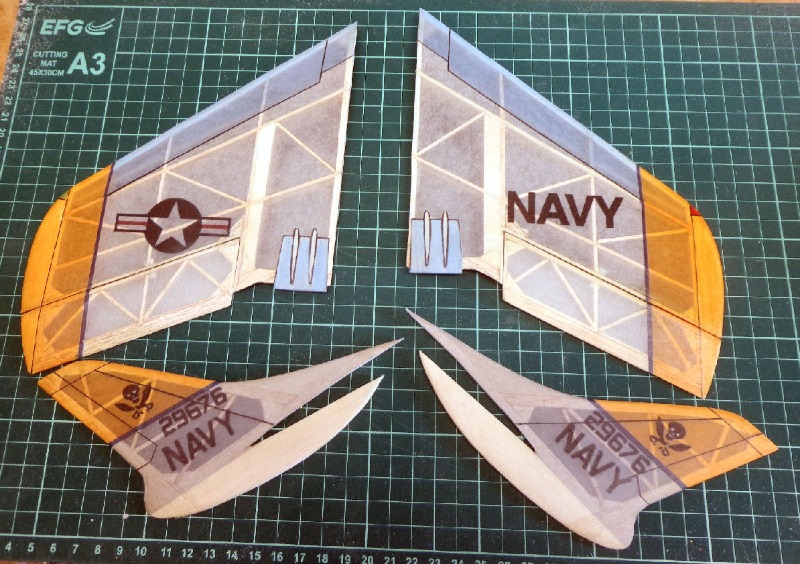
Covering an open structure with pre-printed tissue was really quite difficult. No surprise there, you say! The first task was to modify - expand/distort the '2D' templates to enable compatibility with a 3D structure. There is software to do this, but in the end it was more a case of modify - print - try. :unsure:
The fuselage was the most challenging, and in the end I covered the main body in strips, apart from the nose, which had the most decoration. The wings were easier. I used Modelspan for its wet strength (well dampened before applying) and pukka Epson ink cartridges that, in the main, are water resistant when dry.

So here are the nearly finished bits of the Cutlass ready for final assembly:


The main body looked a bit bare before I added a few panel lines etc with a pen.

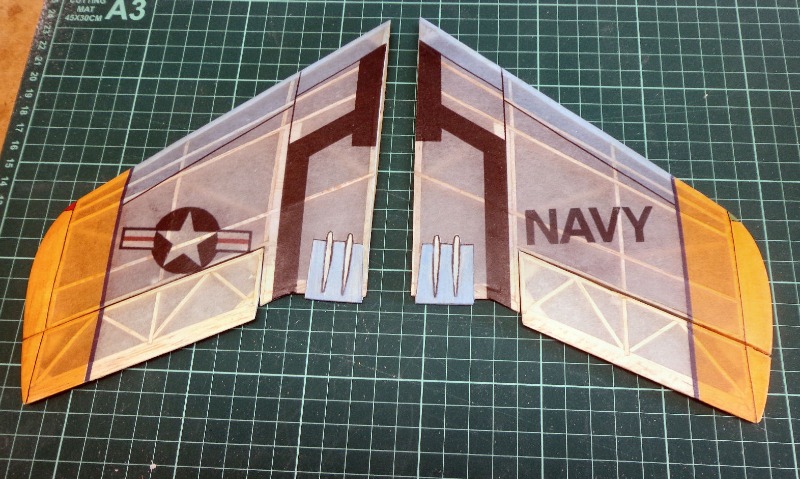
The wings were easier, but care was needed to line things up.


Even so, the insignia is not quite where it should be.:woohoo:

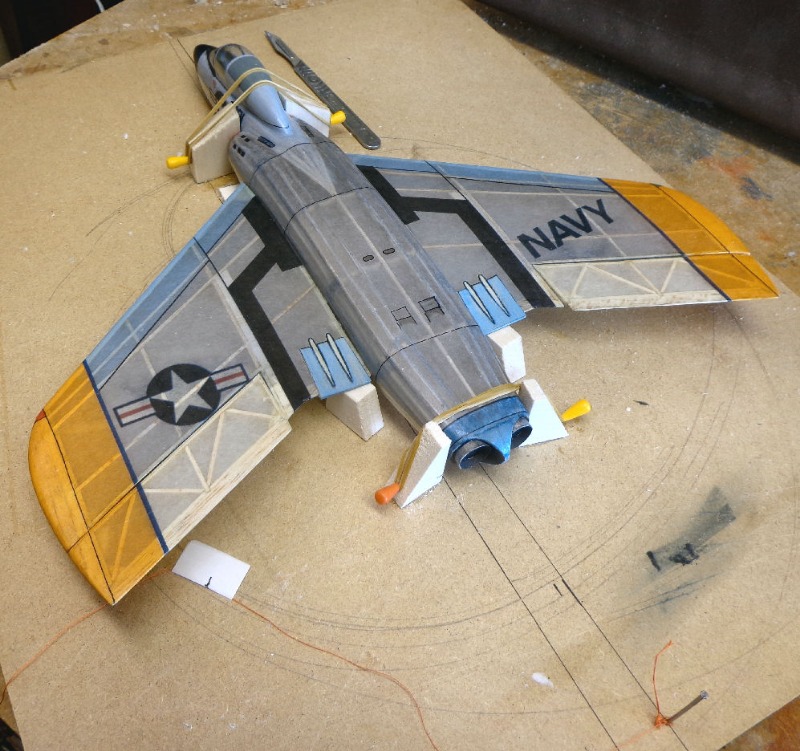
With experience of the top, the underside proved less stressful:


The rear canopy was also tissue covered followed by a wash of acrylic paint. The detail is pre-coloured strips of tissue in a double layer. Some paint was applied here and there and a marker pen was used for the lines so that it all looked 'half right' to my by now jaundiced perception:


The look of the 'rear end' is also critical to the verisimilitude of the model. The jet piped are silver covered paper with a wash of 'smoke'.


The next step is to glue it all together. I'm hoping I wont need much nose weight (if any) as it is starting to be a bit heavier than I wanted.

We shall see!

Please Log in or Create an account to join the conversation.

Last Edit: by rogersimmonds.

Built-up Skyleada for Jetex 50 5 years 4 months ago #771

  • ahmetcalfe
  • ahmetcalfe's Avatar
  • Offline
  • Administrator
  • Administrator
  • Posts: 293
  • Thank you received: 120
Can't wait to see it assembled, it looks very nice indeed already. The translucency will look a treat in the air with the sun shining through the tissue. Hope she flies a good is she looks.
The following user(s) said Thank You: rogersimmonds

Please Log in or Create an account to join the conversation.

Built-up Skyleada for Jetex 50 5 years 4 months ago #775

  • rogersimmonds
  • rogersimmonds's Avatar Topic Author
  • Offline
  • Administrator
  • Administrator
  • Posts: 562
  • Karma: 8
  • Thank you received: 140
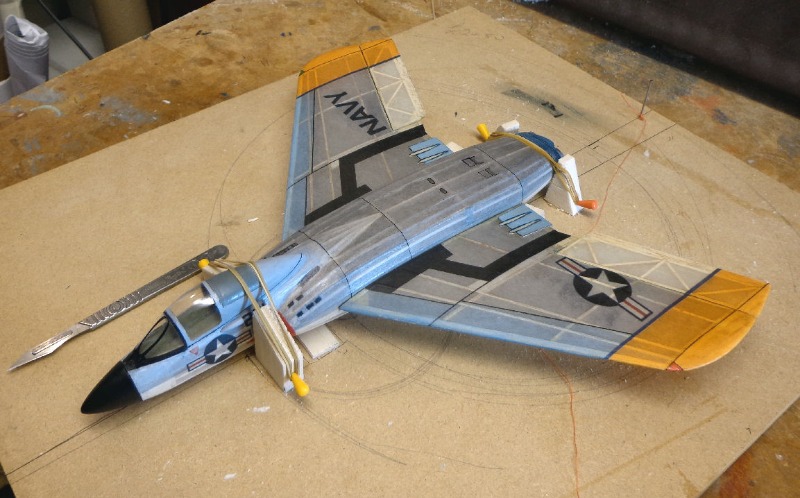
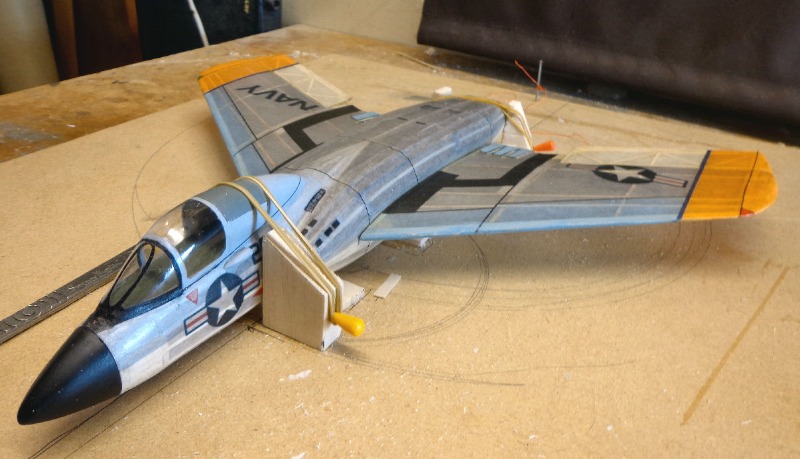
The Cutlass wings are simply 'butt glued' to the 1/16" fuselage sides. As is my usual practice, to ensure accuracy, I made a sort of jig so I could make sure everything was lined up accurately, i.e. the two wings matched and were square to the fuselage etc. Make a mistake here and the model is ruined!


I used epoxy with a bit of filler; though it is 'quick setting', there is still plenty of time when it is still 'gooey' to make small adjustments before it sets hard. Note the datum line on the board, the matched balsa blocks under the trailing edge and the cotton thread used to check alignment.

All this might be a bit 'OTT', but our models can fly quite fast and accuracy of the flying surfaces is important. I was pleased the Cutlass seemed to line up OK without too much 'fettling' .:cheer:
Attachments:

Please Log in or Create an account to join the conversation.

Last Edit: by rogersimmonds.
Time to create page: 0.096 seconds
Powered by Kunena Forum