Welcome, Guest
Username: Password: Remember me

TOPIC: Building the Skyleada Cutlass for Jetex 50

Building the Skyleada Cutlass for Jetex 50 6 years 3 weeks ago #753

  • rogersimmonds
  • rogersimmonds's Avatar Topic Author
  • Offline
  • Administrator
  • Administrator
  • Posts: 595
  • Karma: 8
  • Thank you received: 166
Those of you who have read 'John's Jetex Journey' will be as impressed with John Holman's Keil Kraft Flying Scale models as I was.

John has built another Skyray from an 'Easy Built' kit to join his KK one:


Above: John's Skyrays. The EB version is the one behind. Slightly larger than the KK kit, it is otherwise identical. Very tasty indeed!

John's models, you will remember, are powered by genuine vintage Jetex motors, and tissue covered without painting for lightness. This is important as Jetex motors are heavier than Rapier L-2's and the thrust from 50 year-old pellets may not be up to the specified '0.5-0.75 oz'

John flew his models at Old Warden, and very well they went too.:cheer:

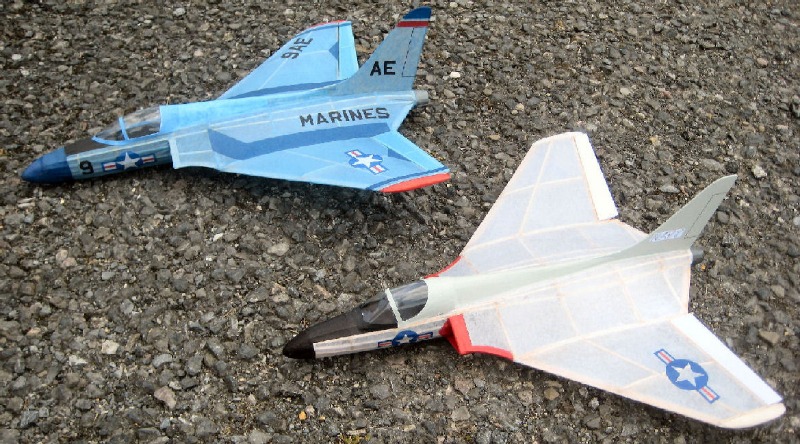
This is inspirational, so I thought I would emulate John and build a proper built-up model for Jetex 50 and cover it with plain tissue. But which model? I then had a happy thought: I have recently completed a printed tissue over balsa Cutlass:


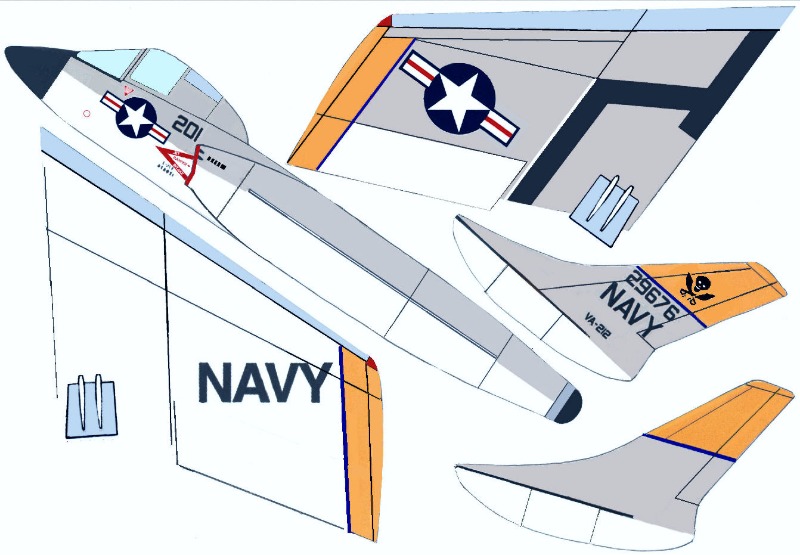
and have the templates for it. With just a bit of modification they could be suitable to cover a built-up proper '3D'structure

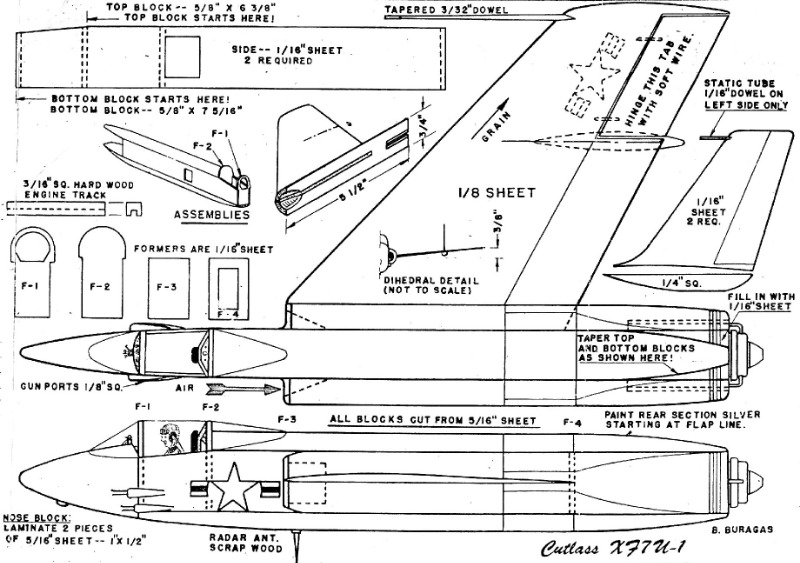
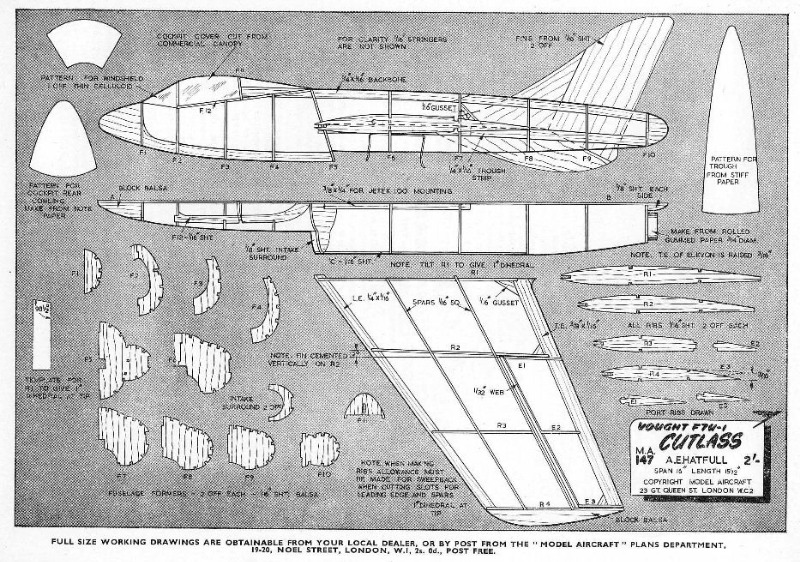
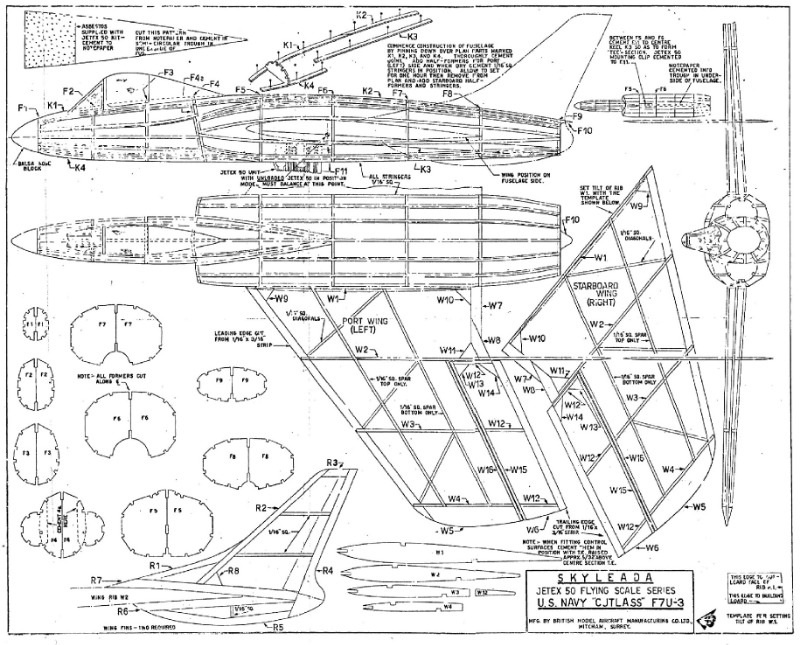
So a Cutlass it was going to be. But which one? There are four choices, the 'all sheet 'Jigtime' kit, Bob Buragas's all-sheet design from 1951; Albert Hatfull's 'stick 'n tissue' design published in the Aeromodeller in 1953, and the Skyleada kit version. Here they are in order:


The first two are no more than 'cartoons' of the real thing, though the Jigtime model, made of pre-printed sheets is undoubtedly attractive. Albert Hatfull's design is for Jetex 100 and not very accurate. Which left the Ray Booth's Skyleada design. This is not perfect (the canopy is the wrong shape for the stated version) but it is pretty good, the plan shows all the parts - wing ribs and fuselage formers- and - if you are so inclined - there is a very nice kit available from the Vintage Model Company.

So Skyleada it had to be. A high-res plan was downloaded from the 'Outerzone' website and planning could begin. Planning included:

1. What modifications, if any, (extra stringers, hinged elevons etc) will be made to the structure ?
2. Will I change the outlines of any parts - for example the nose and canopy?to conform better to the real thing?

If (2) I will have to make a plug and mould a canopy - a procedure I find as stressful as painting!:woohoo:

We will see. Watch this space for progress!

Please Log in or Create an account to join the conversation.

Last Edit: by rogersimmonds.

Built-up Skyleada for Jetex 50 6 years 3 weeks ago #754

  • rogersimmonds
  • rogersimmonds's Avatar Topic Author
  • Offline
  • Administrator
  • Administrator
  • Posts: 595
  • Karma: 8
  • Thank you received: 166
Having decided on the Skyleada Cutlass, I thought it a good idea to try out the technique of 'pre-printed tissue over an open structure' which is new to me and I needed to learn how to do it. The template for my profile Cutlass:


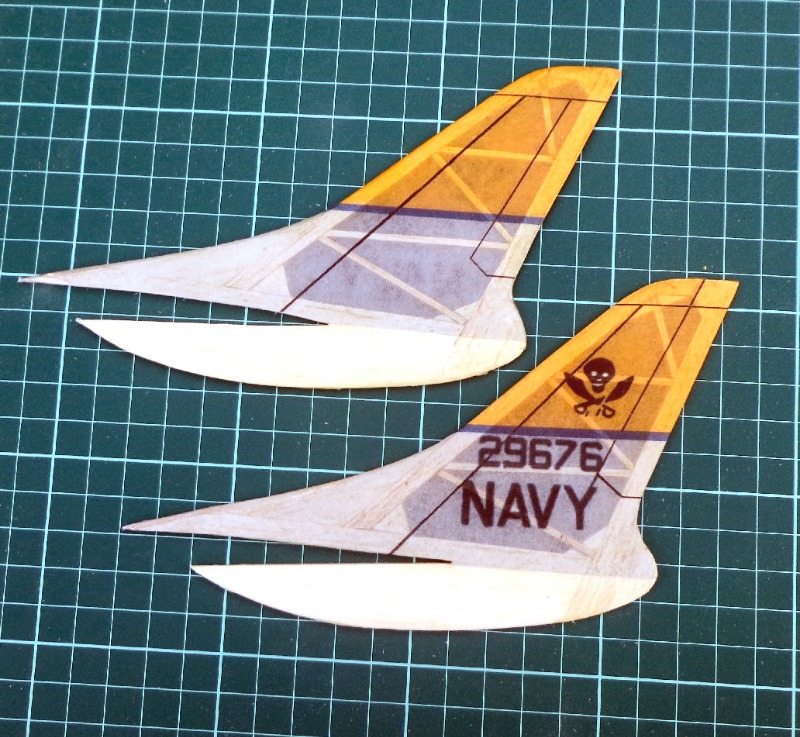
was easily enough adapted to the slightly different shapes and sizes of the Skyleada design. Starting with the smallest components, the fins, and selecting the 'photo' setting on my inkjet printer, the 'Modelspan' tissue ' was printed and allowed to dry before being slightly dampened with water spray and applied with dope as adhesive. Two coats of shrinking dope completed the job:


I was pleased with these. The ink had not run and the depth of colour quite good. I like the translucent effect and it certainly beats a plain coloured finish. It is, though a lot of work and I had to print off several copies of the fin before everything matched to my satisfaction.:dry:

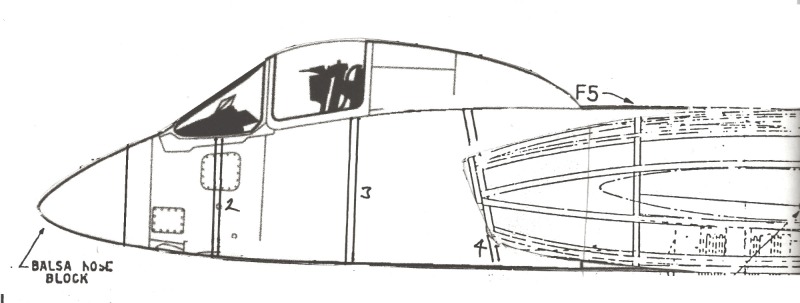
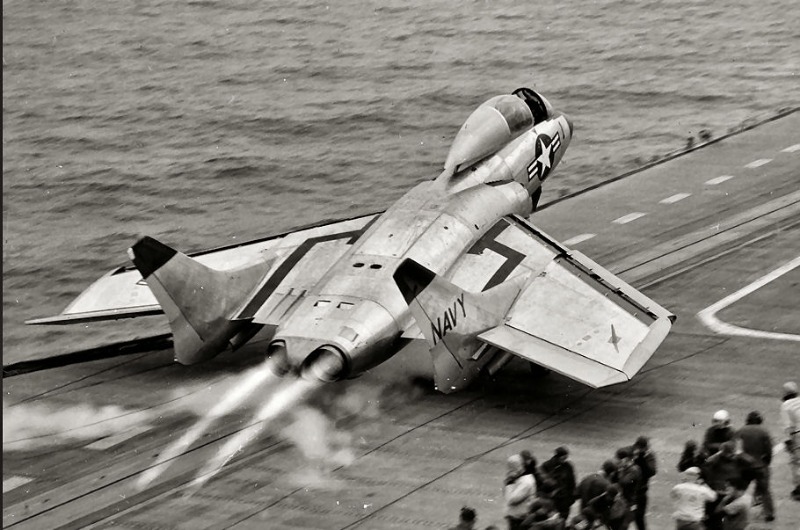
The 'real' Cutlass canopy is quite large and distinctive and adds a lot of character to the aircraft, so I modified the Skyleada plan to match the production Cutlass. The plan, I think, shows that of the very first prototype.


Above: plan modified to depict the production Cutlass. The canopy and nose add a lot of character I think.

I made a plug for the modified canopy. It was larger than is usual for me and too big for my homemade vac box! :whistle:

I'm always uncertain of my ability to mould a reasonable canopy, but I bought a new A5 vac-forming box on eBay, see:
A5 Vac box


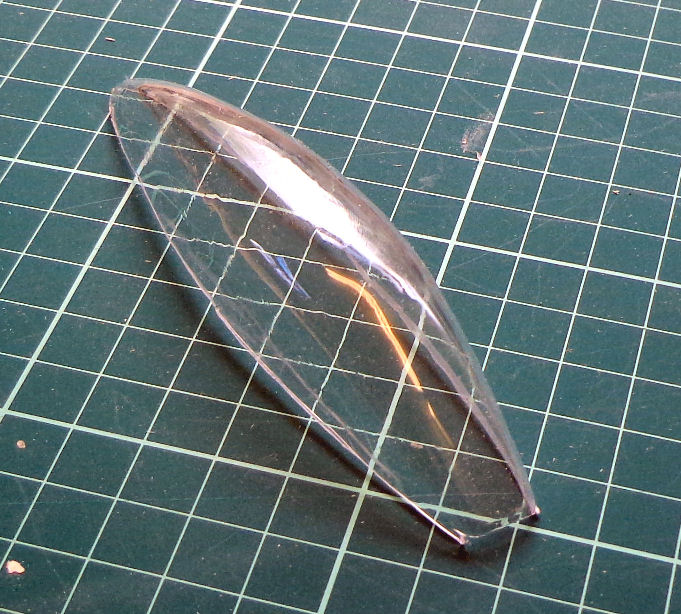
and this worked OK after some experiments with temperature and pressure with 0.5 mm clear PETG sheet..


Not too bad (for me) Buffed up with a bit of 'Brasso' and dipped in 'Johnson's Klear' (thank you Howard) it should be OK.

This gave me confidence to build the wings:


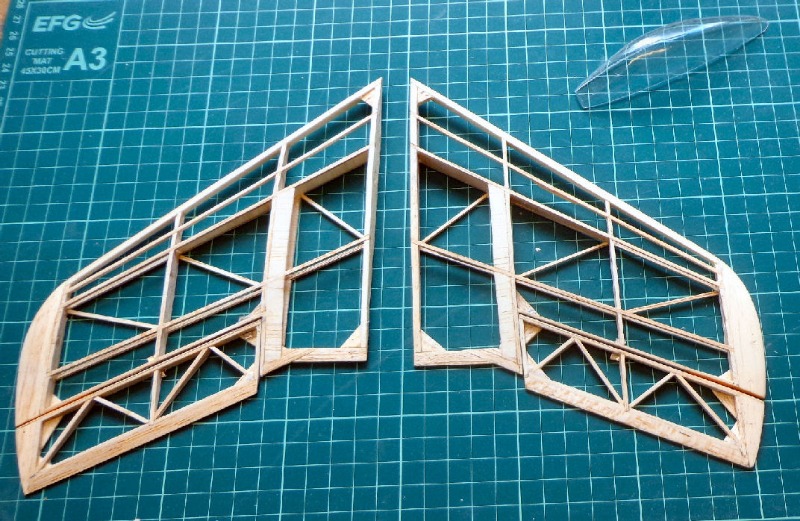
You will see I have modified the leading edge spar, added two extra spars with a bit of webbing and diagonals for the elevons (I didn't want these warping). These are glued in place according to the plan with 5/32" of 'up'. Mine are hinged.

So this is progress so far. Whether covering the much larger area of the wing with printed tissue is as relatively trouble free as the wings remains to be seen. :S

More later.

Please Log in or Create an account to join the conversation.

Last Edit: by rogersimmonds.

Built-up Skyleada Cutlass for Jetex 50 6 years 3 weeks ago #755

  • ahmetcalfe
  • ahmetcalfe's Avatar
  • Offline
  • Administrator
  • Administrator
  • Posts: 313
  • Karma: 1
  • Thank you received: 143
This is coming along very nicely, I much prefer the big canopy and am looking forward to seeing how you get on covering the fuselage, lots of panels I guess. To me it has always been a fascinating aircraft and your colourful choice of subject is going to look very attractive.

Please Log in or Create an account to join the conversation.

Last Edit: by rogersimmonds.

Built-up Skyleada for Jetex 50 6 years 2 weeks ago #762

  • rogersimmonds
  • rogersimmonds's Avatar Topic Author
  • Offline
  • Administrator
  • Administrator
  • Posts: 595
  • Karma: 8
  • Thank you received: 166
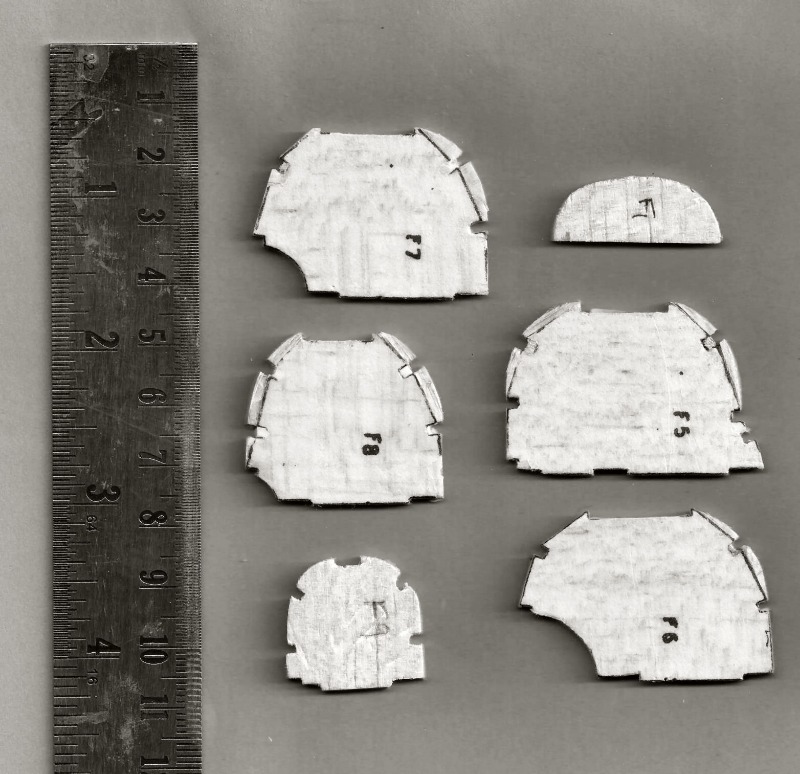
I transferred the templates of the fuselage formers by photocopying the relevant part of the plan (Skyleada plans, in contrast to Keil Kraft plans show all the parts, a great advantage) on to tissue and doping this on to light quarter grain 3/32 (not 1/16") balsa.
F 1 was of course redrawn, but it wasn't until I had cut them all out that I realised some of the cross sections were much more rounded than they should be. If you look at photos of the Cutlass the top of the fuselage is almost flat. So the carefully cut out F5-F9 had to be modified, as F 1 had been:


not too difficult, but tiresome all the same!

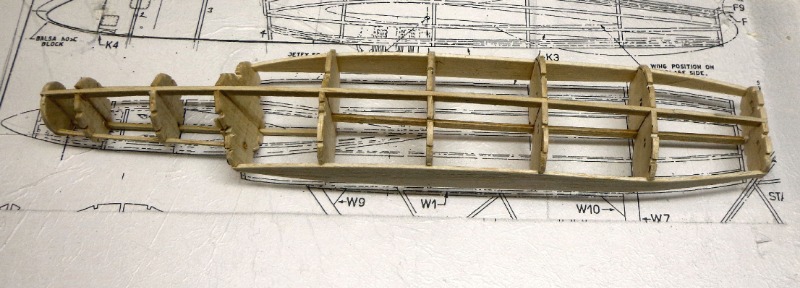
Next, glue left hand side to keels add a couple of stringers and where the wing is glued to the fuselage:


The right hand side is then added. Using 3/32" balsa makes the potentially tricky step easier I find.


Everything seemed to line up nicely. Next job is to add the stringers. But first I'll have to work out where they all go - it's not that clear from the plan! :unsure:
I'll also be adding a fair bit of sheet infill - another deviation from the plan.

More later
Attachments:

Please Log in or Create an account to join the conversation.

Built-up Skyleada for Jetex 50 6 years 1 week ago #763

  • ahmetcalfe
  • ahmetcalfe's Avatar
  • Offline
  • Administrator
  • Administrator
  • Posts: 313
  • Karma: 1
  • Thank you received: 143
Following with interest, thanks for posting

Please Log in or Create an account to join the conversation.

Built-up Skyleada for Jetex 50 6 years 1 week ago #764

  • rogersimmonds
  • rogersimmonds's Avatar Topic Author
  • Offline
  • Administrator
  • Administrator
  • Posts: 595
  • Karma: 8
  • Thank you received: 166
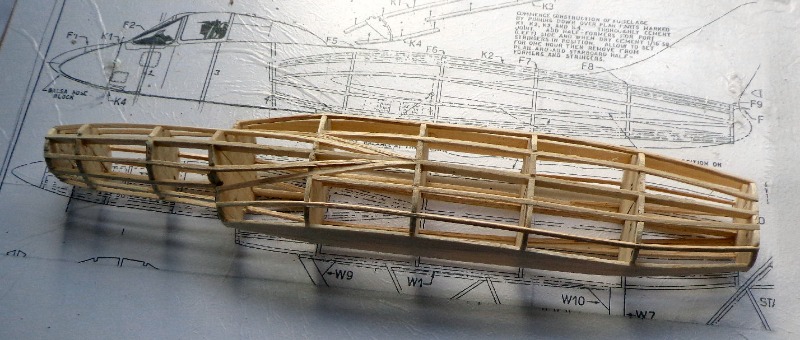
I've added 1/16" balsa stringers, cut from some hard balsa sheet I had to hand. The bought '1/16" stringers were a tad undersize and were loose in the slots.
In the end I worked out where everything went, and was quite pleased, with some judicious widening of a couple of former slots, they lined up without too much waviness:


Note I've added an extra light stringer to support the trough.

The top the fuselage is nicely flat too match the real thing:


The fuselage will need will need at least a couple of stringers on the corners - the radius of the curve is noticeable on the real thing and I want to to keep my oh-so-carefully-modified fuselage cross section a feature on the model. The stringers have added 3 grams so far so a few more will be OK. ;)
Attachments:

Please Log in or Create an account to join the conversation.

Last Edit: by rogersimmonds.
Time to create page: 2.951 seconds
Powered by Kunena Forum